
Picture this: You're gliding silently across a mirror-calm flat at dawn, your kayak cutting through the water like a knife through butter. Suddenly, a massive redfish explodes on your topwater plug just 20 feet from your bow. Your heart races as you set the hook, but then disaster strikes—your rod holder fails, your paddle floats away, and your tackle box spills into the bilge. This nightmare scenario happens to countless anglers who neglect proper planning when it comes to their inshore saltwater fishing kayak setup.
After spending over 15 years guiding clients through the coastal waters of the Gulf and Atlantic, I've learned that success in kayak fishing isn't just about finding fish—it's about having a meticulously organized, properly equipped vessel that becomes an extension of your fishing strategy. Whether you're targeting speckled trout in Louisiana marshes, snook along Florida mangroves, or striped bass in the Northeast, your inshore saltwater fishing kayak setup can make the difference between a memorable day on the water and a frustrating exercise in equipment failure.
Key Takeaways
- Kayak selection matters: Pedal-drive systems offer hands-free fishing advantages, while sit-on-top designs provide better stability and fish-fighting capabilities in inshore saltwater environments
- Strategic gear organization: Proper rod holder placement, tackle storage solutions, and electronics integration create efficiency that directly translates to more fish caught
- Budget-conscious approach: A functional inshore saltwater fishing kayak setup can be achieved at multiple price points, from $1,500 entry-level to $5,000+ tournament-ready configurations
- Safety is non-negotiable: PFDs, communication devices, and proper anchoring systems aren't optional accessories—they're essential components that protect your life on the water
- Maintenance extends lifespan: Saltwater environments demand rigorous post-trip cleaning protocols and equipment care to prevent corrosion and ensure long-term reliability
Understanding Your Inshore Saltwater Fishing Kayak Setup Foundation

The foundation of any successful kayak fishing operation starts with selecting the right platform. In 2026, the kayak fishing industry has evolved dramatically, offering anglers unprecedented options for customization and performance. However, this abundance of choice can overwhelm even experienced anglers when building their inshore saltwater fishing kayak setup.
Kayak Platform Selection: The Critical First Decision
When I started kayak fishing in 2011, the market offered maybe a dozen dedicated fishing kayaks. Today, manufacturers produce hundreds of models, each claiming superiority. For inshore saltwater applications, your choice fundamentally impacts every other aspect of your setup.
Sit-on-Top vs. Sit-Inside Kayaks
For saltwater inshore fishing, sit-on-top (SOT) kayaks dominate for good reasons. The self-bailing design handles waves, wakes, and the inevitable water intrusion that comes with fighting fish in dynamic environments. I've watched countless anglers attempt inshore fishing from sit-inside kayaks, only to discover that a single errant wave or splashing redfish can flood the cockpit, creating dangerous situations.
SOT kayaks also provide superior fish-fighting capabilities. When a 30-pound bull redfish makes its first run, you need stability and the ability to shift your weight. The wide, open deck of a quality SOT allows you to brace your legs, adjust your position, and maintain control—luxuries you simply don't have in confined sit-inside designs[1].
Propulsion Systems: Pedal Drive vs. Paddle
This decision significantly impacts your fishing efficiency and budget. Pedal-drive kayaks, pioneered by Hobie's MirageDrive system and now offered by numerous manufacturers, provide hands-free propulsion that revolutionizes inshore fishing tactics.
Consider this scenario: You're working a grass flat, making repetitive casts to potholes while maintaining position against a 10-knot wind. With a pedal drive system, you can continuously adjust your position, keep both hands on your rod, and maintain optimal casting angles. With a traditional paddle kayak, you're constantly setting down your rod, grabbing your paddle, repositioning, then picking up your rod again—losing precious seconds and disrupting your rhythm.
However, pedal drives come with tradeoffs. They add 40-60 pounds to your kayak's weight, increase initial costs by $1,000-$2,000, and require more maintenance in saltwater environments. For anglers who primarily fish protected waters and prioritize fishing efficiency over portability, pedal drives represent an excellent investment. For those who frequently launch from challenging locations or need to transport kayaks in smaller vehicles, traditional paddle systems remain viable[2].
Length and Width Considerations
Inshore saltwater fishing kayaks typically range from 10 to 14 feet in length. Shorter kayaks (10-12 feet) offer superior maneuverability in tight quarters—essential when navigating narrow creek channels or fishing around dock pilings. They're also easier to transport and launch solo.
Longer kayaks (12.5-14 feet) track better in wind and current, cover distance more efficiently, and typically offer more storage capacity. For anglers who frequently paddle 3-5 miles to reach fishing grounds, the extra length pays dividends in reduced fatigue.
Width directly correlates with stability. Most fishing kayaks measure 30-36 inches wide. Narrower designs (30-32 inches) paddle faster and handle better in rough water but require more skill to fish from standing positions. Wider platforms (34-36 inches) sacrifice some speed for rock-solid stability that allows confident stand-up fishing—a significant advantage when sight-fishing for redfish or searching for subsurface structure.
Weight Capacity and Load Distribution
One of the most overlooked aspects of inshore saltwater fishing kayak setup involves understanding weight capacity and proper load distribution. Manufacturers list maximum weight capacities, but optimal fishing performance occurs at 60-75% of maximum capacity.
A kayak rated for 400 pounds might seem adequate for a 200-pound angler plus 100 pounds of gear. However, loading it to 300 pounds leaves only 100 pounds of reserve capacity—insufficient for maintaining proper waterline, stability, and handling characteristics. I recommend calculating your total system weight (angler + gear + accessories + water/food) and selecting a kayak with a maximum capacity at least 150 pounds above that figure.
Load distribution matters equally. Concentrate heavy items (coolers, tackle bags, batteries) near the kayak's center of gravity, typically just behind the seat. Placing heavy items in the bow or stern raises the center of gravity and creates trim issues that affect tracking, stability, and paddling efficiency.
Essential Gear and Equipment for Your Inshore Saltwater Fishing Kayak Setup
With your kayak platform selected, building out your inshore saltwater fishing kayak setup requires strategic equipment choices. The gear you select should enhance fishing efficiency while maintaining the kayak's inherent advantages: stealth, maneuverability, and access to shallow water.
Rod and Reel Selection for Inshore Kayak Fishing
Rod selection for kayak fishing differs significantly from boat fishing. Space constraints, fighting position limitations, and the need to manage multiple rods simultaneously require thoughtful choices.
Optimal Rod Specifications
For inshore saltwater kayak fishing, I recommend 7-7.5 foot medium to medium-heavy power rods as your primary workhorses. This length provides sufficient casting distance while remaining manageable in the confined space of a kayak. Shorter rods (6.5-7 feet) excel for working tight structure like dock pilings or mangrove roots. Longer rods (7.5-8 feet) work better for open water situations requiring maximum casting distance.
Fast to extra-fast action tips provide the sensitivity needed to detect subtle bites while offering sufficient backbone to drive hooks home and control powerful inshore species. Moderate-fast actions work well for treble-hooked lures like topwaters and crankbaits, reducing the likelihood of fish throwing hooks during the fight.
Reel Considerations
Spinning reels dominate inshore kayak fishing for good reason. They cast light lures efficiently, handle wind better than baitcasters, and require less maintenance in saltwater environments. For most inshore applications, 2500-4000 size reels provide optimal line capacity and drag performance.
I spool my reels with 10-15 pound braided line for most inshore situations. Braid's thin diameter, lack of stretch, and superior sensitivity make it ideal for kayak fishing where direct contact with your lure matters. Add a 20-30 pound fluorocarbon leader (18-24 inches) to provide abrasion resistance and reduce visibility in clear water.
For anglers who prefer baitcasting equipment, low-profile reels in the 100-200 size range work well. However, I reserve baitcasters for specific applications: flipping jigs to heavy structure, throwing heavy topwaters, or working large swimbaits. The versatility of spinning gear makes it the better choice for a primary kayak fishing setup.
Rod Holder Configuration
Strategic rod holder placement defines fishing efficiency in your inshore saltwater fishing kayak setup. Most fishing kayaks come with 2-4 molded-in rod holders, but serious anglers need 4-6 total holders to maximize versatility.
I configure my kayak with:
- Two flush-mount holders behind the seat at 45-degree angles for trolling or storing rods while paddling
- Two vertical rocket launchers on each side of the seat for quick access to primary fishing rods
- Two horizontal holders in the front tank well for transporting rods or storing backup setups
This configuration allows me to have two rods rigged and ready (one in each rocket launcher), two rods trolling or stored (flush-mounts), and two additional rods secured for transport (tank well). The system eliminates time wasted re-rigging while maximizing my ability to adapt to changing conditions.
Tackle Storage and Organization Systems
Efficient tackle organization separates productive kayak anglers from frustrated ones. Limited space demands strategic storage solutions that provide quick access while protecting gear from saltwater exposure.
Tackle Storage Options
-
Milk Crate System: The classic kayak fishing storage solution involves a plastic milk crate secured in the rear tank well. Customize it with PVC rod holders, tool holders, and small tackle boxes. This system provides excellent accessibility and customization options but offers limited weather protection.
-
Tackle Bags: Waterproof tackle bags designed specifically for kayak fishing offer superior organization and weather protection. Look for bags with multiple compartments, waterproof zippers, and attachment points compatible with your kayak's rigging.
-
Plano-Style Tackle Boxes: Traditional tackle boxes work well when secured in tank wells or storage compartments. Choose boxes with secure latches that won't pop open during transport or when fighting fish.
-
Soft Plastic Storage: Dedicated soft plastic bags with adjustable compartments prevent baits from melting together in hot conditions. Store these in shaded areas of your kayak to extend bait life.
Tackle Selection for Inshore Kayak Fishing
Your tackle selection should reflect the species you target and the environments you fish. However, certain baits consistently produce across diverse inshore fisheries:
- Soft plastics: 3-5 inch paddle tails, jerk baits, and creature baits in natural colors (white, chartreuse, rootbeer, watermelon)
- Jig heads: 1/8 to 1/2 ounce in various styles (standard round, weedless, screw-lock)
- Topwater plugs: Walk-the-dog style baits, poppers, and prop baits for surface action
- Spoons: Gold and silver spoons in 1/4 to 3/4 ounce for covering water quickly
- Suspending twitch baits: 3-4 inch hard baits for working shorelines and structure
Organize your tackle by technique rather than by lure type. Create "systems" for different fishing scenarios: a shallow water box, a deep water box, a topwater box, etc. This organization allows you to grab the appropriate box for current conditions without sorting through your entire tackle collection on the water.
Electronics and Navigation Equipment
Modern kayak fishing increasingly incorporates technology that enhances fish-finding capabilities and safety. However, electronics integration in a kayak environment presents unique challenges related to power management, mounting, and waterproofing.
Fish Finders and GPS Units
Fish finders have become standard equipment for serious kayak anglers in 2026. Units designed specifically for kayak fishing offer features like side-imaging, down-imaging, and GPS mapping in compact, power-efficient packages.
For inshore saltwater fishing, I recommend units with:
- Screen size: 5-7 inches provides adequate visibility without consuming excessive space
- Transducer type: Transom-mount or scupper-mount transducers work well for kayaks
- Power requirements: Units drawing 1 amp or less maximize battery life
- GPS capability: Waypoint marking and track recording help you return to productive spots
Mount your fish finder within easy viewing distance—typically on a RAM mount attached to your kayak's console or a custom-built dashboard. Ensure the screen remains visible in bright sunlight, a common challenge in inshore environments.
Power Management
Running electronics from a kayak requires careful power management. Most anglers use sealed lead-acid or lithium batteries in the 7-12 amp-hour range. Lithium batteries cost more initially but offer superior performance: lighter weight, faster charging, longer lifespan, and better performance in temperature extremes.
Create a waterproof battery box to house your battery and wiring connections. Mount it in a location that maintains proper weight distribution—typically in the rear tank well or center console area. Use marine-grade wiring and connections to prevent corrosion issues.
Communication and Safety Electronics
Never venture into inshore waters without proper communication equipment. At minimum, carry:
- VHF radio: Waterproof handheld VHF radios provide reliable communication with other boaters and emergency services
- Cell phone: Store in a waterproof case or dry bag as backup communication
- GPS beacon or PLB: Personal locator beacons provide emergency rescue capability in worst-case scenarios
- Whistle: Attach to your PFD for attracting attention
Safety Equipment: Non-Negotiable Components
Safety equipment isn't optional in your inshore saltwater fishing kayak setup. Coastal waters present genuine hazards: changing weather, boat traffic, strong currents, and the potential for capsizing. Proper safety gear protects your life while providing peace of mind that allows you to focus on fishing.
Personal Flotation Devices (PFDs)
Coast Guard regulations require a properly fitted PFD for each person on a kayak. However, a PFD stored in your tank well provides zero protection during an unexpected capsize. Wear your PFD at all times on the water—no exceptions.
Modern fishing-specific PFDs offer features that enhance both safety and fishing efficiency:
- Low-profile design: Doesn't interfere with casting or paddling motions
- Multiple pockets: Store essential items like pliers, lip grips, and small tackle boxes
- Rod holder attachment: Some models include integrated rod holders
- Hydration compatibility: Accommodate hydration bladders for long days on the water
I prefer PFDs with 16-20 pounds of flotation in a Type III design. These provide adequate buoyancy while maintaining comfort during all-day wear.
Anchor Systems
Proper anchoring capability proves essential for inshore kayak fishing. Whether you're holding position on a grass flat, stabilizing against current, or securing your kayak while wading, a well-designed anchor system enhances fishing effectiveness.
Most kayak anglers use one of two anchor types:
- Folding grapnel anchors (3-5 pounds): Work well on hard bottom, oyster bars, and structure
- Stake-out poles (6-8 feet): Ideal for shallow water applications under 6 feet deep
Install an anchor trolley system on at least one side of your kayak. This simple rigging allows you to adjust your anchor point from bow to stern, controlling how your kayak positions relative to wind and current. The ability to adjust anchor position without pulling anchor and re-setting saves time and reduces disturbance to fish.
Additional Safety Considerations
Round out your safety equipment with:
- Bilge pump: Manual pump for removing water from tank wells and storage areas
- Paddle leash: Prevents losing your paddle during fish fights or capsizes
- First aid kit: Waterproof kit with basics for treating hooks injuries, cuts, and sun exposure
- Sun protection: Hat, sunglasses, sun-protective clothing, and sunscreen
- Hydration: Minimum 2 liters of water for half-day trips, more for full days
- Knife: For cutting line, leaders, or freeing yourself from entanglements
Advanced Rigging and Customization for Your Inshore Saltwater Fishing Kayak Setup
Once you've established the essential components of your inshore saltwater fishing kayak setup, advanced rigging and customization can elevate your fishing efficiency to professional levels. These modifications reflect years of on-water experience and address specific challenges unique to kayak fishing.
Rigging Techniques for Maximum Efficiency
Leash Everything Critical
One of the first lessons kayak anglers learn (usually the hard way) is that anything not secured will eventually end up in the water. I use retractable gear leashes for:
- Pliers and fishing tools
- Lip grips and fish handling tools
- Paddle (when setting it down to fight fish)
- Rod (when leaning it against the kayak)
- Camera or phone
Quality retractable leashes extend 36-48 inches, providing adequate working range while keeping gear secured. Attach leash anchor points to solid mounting locations on your kayak, not to loose items or weak attachment points.
Lighting Systems for Extended Fishing Hours
Many productive inshore fishing periods occur during low-light conditions: dawn, dusk, and night. Proper lighting extends your fishing opportunities while ensuring safety and legal compliance.
Install a 360-degree white navigation light on a pole mount at your kayak's highest point. This light makes you visible to other boaters—a critical safety consideration. LED lights draw minimal power while providing excellent visibility.
Add task lighting to illuminate your work area: headlamps for hands-free operation, deck lights for tackle organization, and underwater lights to attract baitfish when night fishing. Green underwater lights work particularly well for attracting bait while minimizing light pollution that spooks fish.
Accessory Mounting Systems
Modern kayak rigging relies heavily on track-mounted accessories. Most fishing kayaks now include factory-installed mounting tracks (typically Yak-Attack or RAM compatible). These tracks allow tool-free installation and adjustment of:
- Rod holders
- Fish finders and electronics
- Camera mounts
- Cup holders and gear storage
- Anchor cleats and fairleads
Plan your track-mounted accessories strategically. Place frequently-accessed items within easy reach from your seated fishing position. Mount less-frequently-used items in locations that don't interfere with paddling, casting, or fish fighting.
Customization for Specific Inshore Environments
Shallow Water Modifications
Fishing ultra-shallow flats (under 2 feet) requires specific modifications to your inshore saltwater fishing kayak setup. Replace standard fin boxes with shallow-water fins that reduce draft. Install a push pole holder for silently navigating skinny water without spooking fish.
Consider adding a raised seat or standing platform. Many kayak manufacturers now offer aftermarket standing platforms that increase visibility for sight-fishing while providing secure footing. Standing capability transforms your ability to locate fish in shallow, clear water conditions.
Structure Fishing Adaptations
When targeting fish around docks, bridges, and oyster bars, protect your kayak and gear from damage. Install keel guards and hull protection on high-wear areas. Add fender bumpers along the sides to prevent scratches when working tight to structure.
Carry a longer push pole (10-12 feet) for maneuvering around structure without making paddle noise that spooks fish. The extra length allows you to maintain distance from structure while maintaining control.
Rough Water Configurations
Fishing more exposed inshore waters requires additional considerations. Install higher coaming around tank wells to reduce water intrusion. Add scupper plugs to reduce water entry through drain holes. Consider a spray skirt for the cockpit area during rough conditions.
Secure all gear with additional tie-downs and ensure tackle boxes have locking latches. A rogue wave can send unsecured items flying, creating dangerous projectiles and potential losses of expensive equipment.
Inshore Fishing Techniques Optimized for Kayak Fishing

Your inshore saltwater fishing kayak setup means nothing without effective techniques for locating and catching fish. Kayak fishing requires adapted approaches that leverage your platform's unique advantages while working within its limitations.
Stealth Approaches and Fish Location
The kayak's greatest advantage over powerboats is stealth. You can approach fish without engine noise, hull slap, or the visual profile of a large boat. However, maximizing this advantage requires understanding how to approach fish without spooking them.
Reading Water and Structure
Successful inshore fishing starts with reading water and identifying high-probability fish-holding areas. From a kayak's low vantage point, this skill becomes even more critical. Look for:
- Color changes: Indicate depth changes, current edges, or structure
- Nervous water: Surface disturbances suggesting baitfish presence
- Bird activity: Diving birds mark feeding fish
- Tidal flow patterns: Current creates ambush points near structure
- Grass edges and potholes: Transition zones hold predatory fish
Approach productive areas from downwind and downcurrent when possible. This allows you to drift naturally into position without excessive paddling that creates noise and disturbance. Use your anchor or stake-out pole to hold position once you've located fish.
Drift Fishing Strategies
Drift fishing from a kayak allows you to cover water efficiently while maintaining stealth. Position yourself upwind or upcurrent of productive areas, then drift through while casting to likely holding spots.
Control your drift speed with a drift sock or sea anchor. These devices deploy from your stern, creating drag that slows your drift to optimal fishing speed. In strong wind or current, a drift sock can reduce your speed by 50-75%, giving you more time to work each area thoroughly.
Make your first casts to the farthest targets, then work closer as you drift. This approach prevents spooking fish in nearby water before you've had a chance to present your lure.
Casting Techniques from a Kayak
Casting from a seated position in a kayak presents unique challenges and requires adapted techniques for maximum effectiveness and safety.
Seated Casting Fundamentals
Most kayak fishing occurs from a seated position. This lower angle affects casting distance, accuracy, and hook-setting power. Compensate by:
- Using sidearm casts rather than overhead casts to maintain control
- Employing shorter, more compact casting motions
- Positioning your body to face your target rather than casting across your body
- Keeping your rod tip low during the cast to generate power from a seated position
Practice different casting angles to develop versatility. You'll frequently need to cast over your shoulder, under overhanging vegetation, or around obstacles—situations that require non-traditional casting approaches.
Standing Casting Techniques
Standing in a kayak dramatically improves casting distance, accuracy, and fish-spotting capability. However, it requires practice and confidence in your kayak's stability.
Start by standing in calm, protected water with your paddle secured nearby. Place your feet shoulder-width apart, slightly wider than your seated position. Keep your knees slightly bent to absorb kayak movement and maintain balance.
As you gain confidence, practice standing in progressively more challenging conditions. Eventually, you'll develop the balance and core strength to stand and cast in moderate wind and chop—a skill that separates advanced kayak anglers from beginners.
Fighting and Landing Fish from a Kayak
Fighting large fish from a kayak creates unique challenges and thrills. Your low position and limited mobility require adapted fish-fighting techniques.
Initial Hook-Set and Fight Management
When a fish strikes, set the hook with a firm, controlled motion rather than an explosive hook-set that might destabilize your kayak. Once hooked, immediately assess the fish's size and power.
For smaller fish (under 5 pounds), fight them directly to the kayak with steady pressure. For larger fish, allow them to make their initial runs while maintaining steady drag pressure. Avoid the temptation to "horse" big fish—this often results in pulled hooks or broken tackle.
Position your kayak to fight fish from the side rather than the bow or stern. This orientation provides better leverage and reduces the likelihood of the fish pulling you off balance or capsizing your kayak.
Landing Techniques
Landing fish from a kayak requires planning and proper technique. For most inshore species, I use one of three landing methods:
- Lip landing: Grab smaller fish (under 10 pounds) by the lower lip using your hand or a lip grip tool
- Net landing: Use a short-handled kayak fishing net for mid-sized fish
- Over-the-side landing: Slide larger fish alongside the kayak, unhook them in the water, and photograph them over the side before release
Never attempt to lift large fish into your kayak. A thrashing 30-pound redfish or snook in your lap creates chaos and potential injury. Keep big fish in the water alongside your kayak for unhooking and photos.
Catch Documentation and Release
Modern kayak fishing emphasizes conservation and catch-and-release practices. Proper fish handling ensures healthy releases:
- Minimize air exposure (under 30 seconds)
- Support the fish horizontally, never vertically by the jaw
- Use wet hands or gloves when handling fish
- Revive exhausted fish by moving them forward through the water
- Take photos quickly with the fish partially in the water
For catch documentation, use a measuring board mounted on your kayak or a bump board attached to your hull. These tools allow accurate length measurements without removing fish from the water for extended periods.
Budget Considerations and Cost-Effective Setup Strategies
Building an effective inshore saltwater fishing kayak setup doesn't require unlimited funds. Strategic purchasing decisions and prioritization allow anglers at any budget level to create functional, fish-catching systems.
Three-Tier Budget Approach
Entry-Level Setup ($1,500-$2,500)
A functional starter setup includes:
- Kayak: Quality recreational fishing kayak with basic features ($600-$1,000)
- Paddle: Reliable aluminum or fiberglass paddle ($80-$150)
- Rod and reel combo: Two medium-power spinning combos ($150-$250 each)
- Basic tackle: Essential lures and terminal tackle ($100-$200)
- Safety gear: PFD, whistle, basic first aid kit ($100-$150)
- Accessories: Rod holders, paddle leash, anchor ($150-$250)
This setup provides everything needed to catch fish in inshore waters. Focus on quality essentials rather than expensive upgrades or numerous accessories.
Mid-Range Setup ($3,000-$4,500)
An intermediate setup adds performance and convenience:
- Kayak: Dedicated fishing kayak with enhanced features ($1,200-$2,000)
- Pedal drive: Optional upgrade for hands-free fishing ($1,200-$1,800)
- Rod and reel: Three quality spinning setups ($250-$400 each)
- Electronics: Basic fish finder with GPS ($300-$500)
- Enhanced tackle: Comprehensive lure selection ($300-$500)
- Premium safety gear: Quality PFD with features, VHF radio ($200-$350)
- Accessories: Complete rigging with tracks, holders, lighting ($300-$500)
This level provides excellent fishing capability with enhanced comfort and fish-finding technology.
Premium Setup ($5,000-$8,000+)
A high-end tournament-ready setup includes:
- Kayak: Top-tier fishing kayak with advanced features ($2,500-$4,000)
- Pedal drive: Premium propulsion system ($1,500-$2,000)
- Rods and reels: Multiple high-performance setups ($400-$700 each)
- Electronics: Advanced fish finder with imaging, GPS, mapping ($800-$1,500)
- Comprehensive tackle: Extensive lure collection for all conditions ($800-$1,200)
- Professional accessories: Complete rigging, camera systems, advanced lighting ($800-$1,200)
This level provides maximum performance, comfort, and capability for serious anglers and tournament competitors.
Cost-Saving Strategies
Buy Used Equipment Strategically
The used kayak fishing market offers excellent opportunities for budget-conscious anglers. Kayaks depreciate 20-30% in the first year, then more slowly afterward. A one-year-old kayak in good condition might save you $500-$1,000 compared to new pricing.
When buying used kayaks, inspect:
- Hull integrity (no cracks, major scratches, or soft spots)
- Hardware condition (check for corrosion on metal components)
- Hatch seals and covers (ensure they're functional and watertight)
- Seat condition (replacement seats cost $100-$300)
Avoid kayaks with structural damage, severe UV degradation (chalky, faded plastic), or missing critical components.
Prioritize Essential Upgrades
Rather than purchasing every available accessory, prioritize upgrades that directly impact fishing success:
- Quality PFD: Safety first, always
- Reliable rod holders: Enable multi-rod fishing strategies
- Basic fish finder: Dramatically improves fish location
- Proper anchor system: Essential for position control
- Additional rods: Allows quick adaptation to changing conditions
Delay non-essential upgrades like premium lighting systems, advanced electronics, or cosmetic modifications until after you've established your core setup.
DIY Modifications
Many kayak modifications can be completed as DIY projects with basic tools:
- Install track systems using templates and a drill
- Build custom milk crate rod holders with PVC pipe
- Create custom tackle storage using plastic bins
- Fabricate paddle holders from PVC or pool noodles
- Install basic lighting using marine-grade LED strips
Online kayak fishing forums and YouTube channels provide detailed instructions for hundreds of DIY modifications. These projects save money while allowing customization specific to your fishing style.
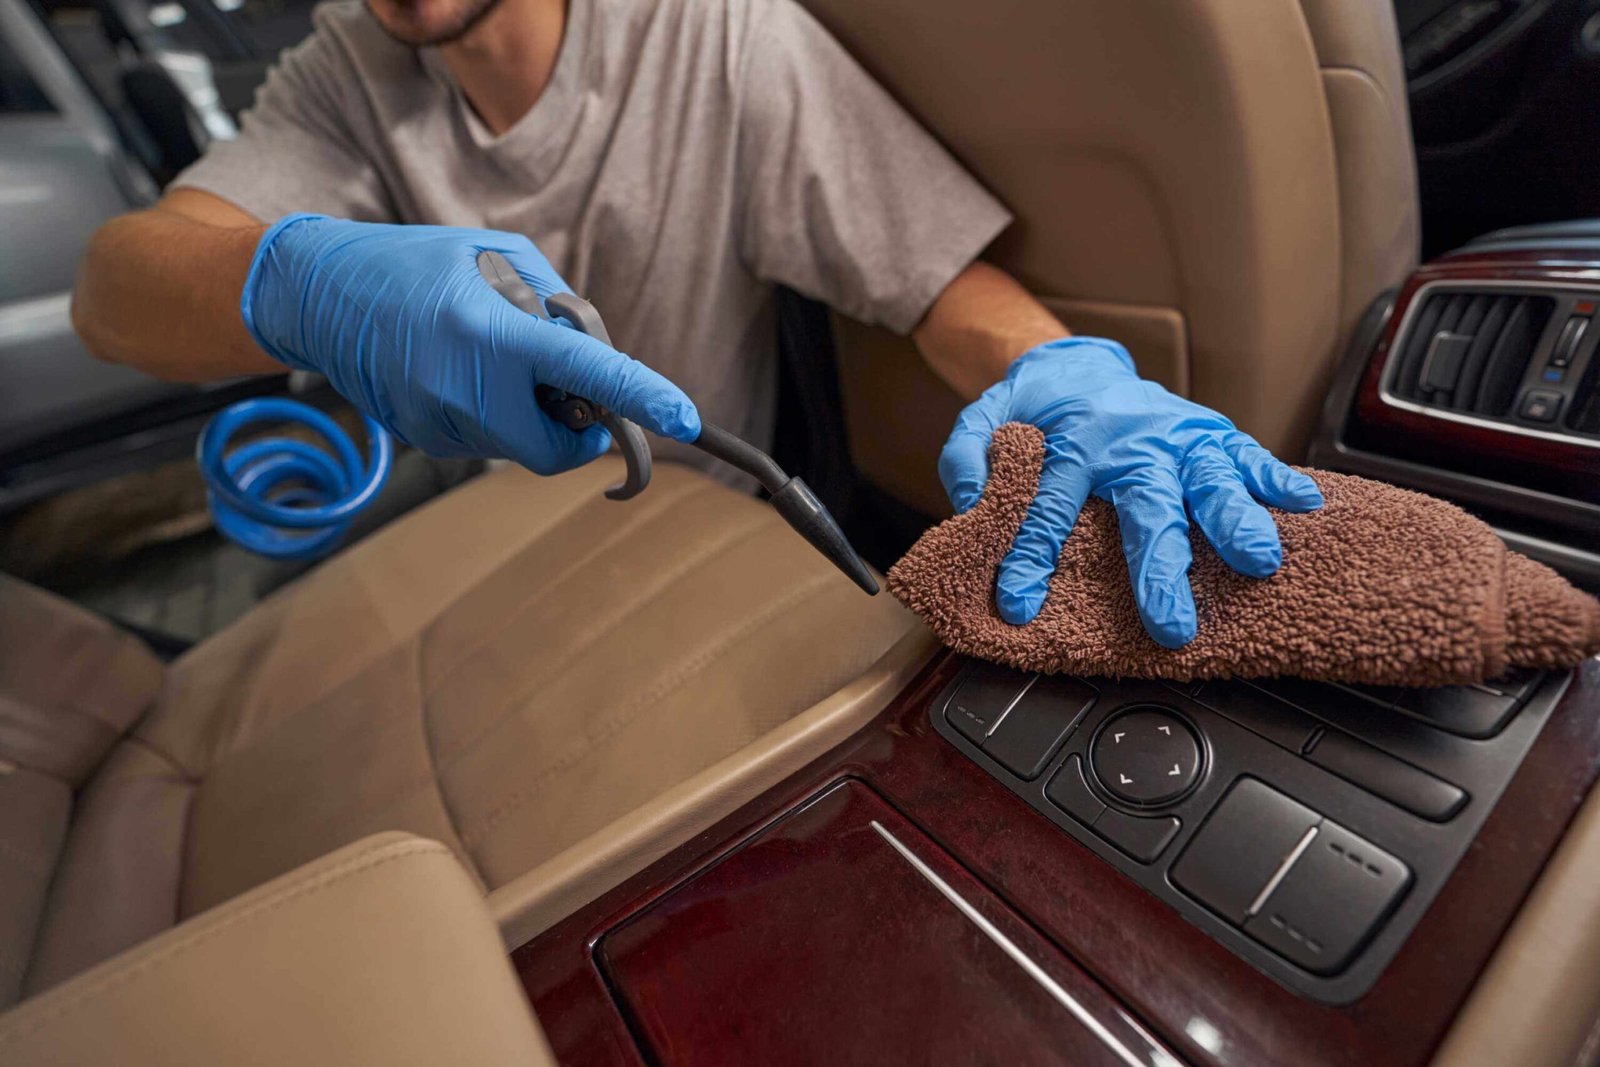
Maintenance and Care for Long-Term Performance
Saltwater environments aggressively attack fishing equipment. Proper maintenance protocols protect your investment and ensure reliable performance for years.
Post-Trip Cleaning Procedures
Immediate Rinse Protocol
After every saltwater trip, thoroughly rinse your entire kayak setup with fresh water. Pay special attention to:
- Metal hardware: Hinges, screws, track systems, and rod holders
- Moving parts: Pedal drives, rudder systems, and adjustable components
- Electronics: Transducers, mounting brackets, and connection points
- Drain plugs: Remove plugs to drain standing water from hulls and compartments
Use a garden hose with moderate pressure to flush salt from crevices and hard-to-reach areas. For pedal drive systems, follow manufacturer-specific cleaning instructions—most require flushing with fresh water after each use.
Deep Cleaning Schedule
Perform thorough deep cleaning monthly or after 10-15 fishing trips:
- Remove all accessories, electronics, and gear
- Wash the entire kayak with mild soap and soft brushes
- Clean and lubricate all moving parts
- Inspect hardware for corrosion and replace as needed
- Check hull integrity for cracks or damage
- Clean and treat rubber components (hatches, bungees)
- Wash and air-dry your PFD and soft goods
This comprehensive cleaning prevents long-term corrosion damage and identifies developing issues before they become serious problems.
Equipment-Specific Maintenance
Rod and Reel Care
Saltwater destroys fishing tackle faster than any other environment. Protect your investment with proper care:
- Rinse rods and reels with fresh water after each trip
- Periodically disassemble reels for deep cleaning and lubrication
- Check rod guides for cracks or corrosion
- Inspect reel seats and handles for looseness
- Replace line regularly (every 6-12 months for braid, more frequently for monofilament)
Store rods horizontally or vertically in a climate-controlled environment. Avoid leaving them in hot vehicles where temperatures can damage rod blanks and reel components.
Electronics Protection
Fish finders and GPS units face harsh conditions in kayak fishing environments:
- Apply protective screen covers to prevent scratches
- Use dielectric grease on all electrical connections
- Store batteries in climate-controlled environments
- Update software and maps regularly
- Check transducer mounting security before each trip
Many electronics failures stem from corroded connections rather than unit failures. Maintaining clean, protected connections prevents most issues.
Kayak Hull and Deck Care
Polyethylene kayaks (the most common material) require minimal maintenance but benefit from:
- UV protectant application 2-3 times per season
- Storage out of direct sunlight when possible
- Proper support during storage (avoid hanging by handles)
- Periodic inspection of drain plugs and scupper holes
Composite kayaks (fiberglass or carbon fiber) require more careful handling:
- Inspect for stress cracks or gelcoat damage
- Repair minor damage promptly to prevent water intrusion
- Wax the hull 2-3 times per season
- Avoid dragging across rough surfaces
Seasonal Storage Considerations
Off-Season Storage
For anglers in regions with defined off-seasons, proper storage protects equipment during extended periods of non-use:
- Thorough cleaning: Complete deep cleaning before storage
- Remove electronics: Store batteries and electronics indoors
- Drain all water: Ensure no standing water remains in hull or compartments
- Proper positioning: Store kayaks on padded racks or suspended from ceiling
- Cover protection: Use breathable covers to prevent dust accumulation while allowing air circulation
- Climate control: Store in temperature-controlled environments when possible
Tackle and Soft Goods Storage
Store tackle in climate-controlled, low-humidity environments:
- Remove hooks from soft plastics to prevent chemical reactions
- Organize tackle boxes and remove rusted or damaged items
- Wash and thoroughly dry PFDs, clothing, and soft goods
- Check anchor lines and ropes for wear or damage
- Inspect and replace worn bungee cords
Regional Considerations for Inshore Saltwater Fishing Kayak Setup

Inshore fishing varies dramatically by region, and your kayak setup should reflect local conditions, target species, and environmental factors specific to your fishing grounds.
Gulf Coast Considerations
Gulf Coast inshore fishing typically involves calm, protected bays, grass flats, and marsh systems. Optimal setups for this region include:
Kayak Features:
- Stability prioritized over speed for sight-fishing shallow flats
- Lighter colors reflect heat in intense sun
- Standing capability for spotting fish in clear, shallow water
Tackle Focus:
- Soft plastics for redfish and speckled trout
- Topwater plugs for explosive surface strikes
- Gold spoons for covering water in murky conditions
Environmental Adaptations:
- Extreme sun protection (clothing, hats, sunscreen)
- Hydration systems for hot, humid conditions
- Insect repellent for marsh fishing
Atlantic Coast Strategies
Atlantic inshore fishing encompasses diverse environments from Carolina sounds to Florida's Indian River Lagoon:
Kayak Features:
- Enhanced rough-water capability for ocean-side fishing
- Larger storage capacity for longer runs to productive areas
- Pedal drives valuable for fighting tidal currents
Tackle Focus:
- Larger lures for striped bass and bull redfish
- Live bait capability for finicky fish in pressured waters
- Heavy leaders for fishing around oyster bars and structure
Environmental Adaptations:
- Stronger anchor systems for swift tidal currents
- Additional safety equipment for more exposed waters
- Weather monitoring tools for rapidly changing conditions
Pacific Coast Approaches
Pacific inshore fishing presents unique challenges with colder water, different species, and varied conditions:
Kayak Features:
- Superior rough-water handling for ocean swells
- Enclosed storage for protecting gear from spray
- Insulated compartments for storing catch
Tackle Focus:
- Heavier tackle for larger species (halibut, lingcod)
- Swimbaits and metal jigs for deeper water
- Specialized rigs for bottom fishing
Environmental Adaptations:
- Cold-water safety gear including dry suits or wetsuits
- Enhanced visibility equipment for foggy conditions
- Larger capacity PFDs for colder water immersion protection
Technology Integration and Modern Innovations
The kayak fishing industry in 2026 continues rapid technological advancement. Understanding and integrating appropriate technology enhances your inshore saltwater fishing kayak setup without overwhelming the simplicity that makes kayak fishing appealing.
Smart Fish Finders and Mapping Technology
Modern fish finders offer capabilities unimaginable just a decade ago. Side-imaging and down-imaging sonar create photographic-quality images of bottom structure, vegetation, and fish. Forward-facing sonar allows real-time observation of fish behavior and lure presentation.
For inshore kayak fishing, I recommend units with:
- Live mapping capability: Create custom maps of your favorite fishing areas
- Shallow water algorithms: Optimized performance in depths under 10 feet
- Smartphone integration: Control units and view data from mobile devices
- Cloud connectivity: Share waypoints and maps with other anglers
However, don't let technology replace fundamental fishing skills. Electronics supplement—not replace—water reading, fish behavior understanding, and presentation skills.
Action Cameras and Documentation
GoPro cameras and similar action cameras have revolutionized fishing documentation. Modern units offer:
- Waterproof construction to 30+ feet
- 4K video quality for stunning footage
- Voice control for hands-free operation
- Image stabilization for smooth video from moving kayaks
Mount cameras on your kayak, helmet, or chest mount to capture fish fights, scenic beauty, and memorable moments. Many anglers now use footage for social media content, tournament documentation, or simply preserving memories.
Communication and Safety Technology
Modern safety technology provides unprecedented security for kayak anglers:
Satellite Communicators: Devices like Garmin inReach provide two-way text communication and SOS capability anywhere in the world. Monthly subscription costs ($15-$50) provide peace of mind for anglers fishing remote areas.
Smartphone Apps: Numerous apps enhance kayak fishing:
- Tide and current predictions
- Weather forecasting with radar
- Fishing log and catch tracking
- Social fishing platforms for sharing information
- Navigation and GPS tracking
Emergency Position-Indicating Radio Beacons (EPIRBs): These devices activate during emergencies, transmitting your location to rescue services. While more expensive ($200-$400), they require no subscription and provide ultimate emergency backup.
Power Management for Electronic Systems
Running multiple electronic devices from a kayak requires careful power management:
Battery Selection:
- Lithium batteries: Lighter weight, longer lifespan, better performance ($150-$400)
- Lead-acid batteries: Lower cost, heavier, shorter lifespan ($40-$100)
Power Distribution:
Install a marine-grade fuse block to protect circuits and enable multiple devices from a single battery. Use appropriate gauge wiring (14-16 AWG for most applications) and waterproof connections throughout.
Solar Charging:
Small solar panels (10-20 watts) can maintain battery charge during long days on the water. Mount panels on kayak decks or inside tank wells where they receive direct sunlight.
Environmental Responsibility and Sustainable Practices
Modern kayak anglers recognize their responsibility as stewards of inshore fisheries. Incorporating sustainable practices into your fishing approach protects resources for future generations.
Catch and Release Best Practices
Proper catch and release techniques ensure fish survival:
Handling Techniques:
- Use barbless hooks or crimp barbs for easier hook removal
- Land fish quickly to minimize exhaustion
- Keep fish in water whenever possible
- Use rubber nets that protect fish slime coats
- Support fish horizontally, never vertically by the jaw alone
Revival Procedures:
Exhausted fish require proper revival before release:
- Hold fish upright in the water
- Move fish forward through the water to force water through gills
- Continue until fish swims away strongly under its own power
- Release fish in calm water away from predators
Selective Harvest:
If keeping fish for consumption:
- Follow all size and bag limit regulations
- Keep only what you'll consume
- Prioritize abundant species over vulnerable populations
- Consider releasing trophy-sized fish (they're the best breeders)
Leave No Trace Principles
Kayak anglers access pristine environments unavailable to larger boats. Protect these areas by:
- Packing out all trash, including fishing line and soft plastics
- Avoiding damage to seagrass beds and sensitive habitats
- Respecting wildlife and maintaining appropriate distances
- Following designated launch sites and access points
- Educating other anglers about responsible practices
Habitat Conservation
Support organizations working to protect and restore inshore habitats:
- Join conservation organizations focused on coastal ecosystems
- Participate in habitat restoration projects
- Report pollution or habitat damage to appropriate authorities
- Support sustainable fishing regulations and management practices
Your fishing license fees fund conservation programs, but direct involvement amplifies your impact on fishery health.
Troubleshooting Common Kayak Fishing Challenges

Even experienced kayak anglers encounter challenges specific to this fishing method. Understanding solutions prevents frustration and keeps you focused on fishing.
Stability Issues and Capsizing
Problem: Kayak feels unstable, especially when fighting fish or standing
Solutions:
- Lower your center of gravity by sitting rather than standing
- Redistribute weight to center heavy items near the seat
- Practice balance exercises in calm, shallow water
- Consider a wider, more stable kayak model
- Use outriggers for additional stability in rough conditions
Capsize Recovery:
Practice self-rescue techniques in controlled conditions:
- Stay calm and remain with your kayak
- Right the kayak by pushing down on one side while pulling up on the other
- Re-enter from the side, sliding onto the deck
- Bail water and recover gear
- If unable to re-enter, use kayak as flotation while signaling for help
Equipment Failures
Problem: Rod holders break, mounts fail, or accessories come loose
Solutions:
- Use marine-grade hardware rated for saltwater environments
- Apply thread-locking compound to critical fasteners
- Regularly inspect and tighten all mounting hardware
- Carry basic tools for field repairs (multi-tool, extra screws)
- Use backup systems for critical equipment (spare paddle, backup anchor)
Navigation and Orientation Challenges
Problem: Difficulty maintaining position or returning to launch sites
Solutions:
- Use GPS to mark your launch point and productive fishing spots
- Study tide and current patterns before trips
- Install a compass on your kayak for basic navigation
- Learn to read natural navigation markers (sun position, wind direction, landmarks)
- Start with shorter trips in familiar waters before venturing into new areas
Fatigue and Physical Demands
Problem: Excessive fatigue from paddling or fishing all day
Solutions:
- Build paddling endurance gradually with progressively longer trips
- Use proper paddling technique to reduce energy expenditure
- Consider pedal drive systems for hands-free propulsion
- Take regular breaks to rest and hydrate
- Plan routes that account for wind and current assistance
Weather-Related Challenges
Problem: Unexpected weather changes create dangerous conditions
Solutions:
- Check detailed weather forecasts before every trip
- Understand weather patterns in your fishing area
- Carry VHF radio to receive weather updates
- Establish personal weather limits and stick to them
- Have a safety plan for seeking shelter if conditions deteriorate
Conclusion: Building Your Perfect Inshore Saltwater Fishing Kayak Setup
Creating an effective inshore saltwater fishing kayak setup represents a journey rather than a destination. Your system will evolve as you gain experience, discover personal preferences, and adapt to the specific waters you fish. The key is starting with a solid foundation—a reliable kayak, essential safety equipment, and quality fishing gear—then building from there based on actual on-water experience.
I've watched countless anglers make the mistake of over-buying before understanding their needs. They invest thousands in equipment that doesn't match their fishing style, then spend more money replacing it with appropriate gear. Start conservatively, fish frequently, and let your experiences guide your equipment decisions.
Remember that the most expensive kayak or the latest electronics won't catch fish for you. Success in inshore saltwater fishing stems from understanding fish behavior, reading water, presenting lures effectively, and spending time on the water. Your kayak setup should enhance these fundamental skills, not replace them.
The beauty of kayak fishing lies in its simplicity and accessibility. With a properly configured inshore saltwater fishing kayak setup, you can access fish-holding waters that larger boats can't reach, approach fish with unmatched stealth, and enjoy an intimate connection with the marine environment that few anglers experience.
Actionable Next Steps
- Assess your current equipment: Create an honest inventory of what you have and identify critical gaps
- Set a realistic budget: Determine what you can invest initially and plan for future upgrades
- Research local conditions: Understand the specific challenges and opportunities in your fishing area
- Connect with local kayak anglers: Join clubs, forums, or social media groups to learn from experienced local anglers
- Start fishing: Get on the water with what you have and let experience guide your setup refinement
- Document your experiences: Keep a fishing log noting what worked, what didn't, and what you'd change
- Prioritize safety: Never compromise on safety equipment regardless of budget constraints
- Practice essential skills: Develop paddling efficiency, casting accuracy, and fish-fighting techniques in controlled conditions
- Maintain your equipment: Establish and follow regular maintenance protocols to protect your investment
- Share knowledge: As you gain experience, help newer anglers avoid common mistakes and enjoy this amazing sport
The inshore waters are calling, and with a properly configured kayak setup, you're ready to answer. Whether you're chasing redfish through Louisiana marshes, targeting snook in Florida mangroves, or pursuing striped bass along the Atlantic coast, your kayak provides the ultimate platform for inshore fishing adventures.
Now it's time to stop reading and start fishing. Your perfect inshore saltwater fishing kayak setup awaits, and the fish won't catch themselves. See you on the water!
References
[1] American Canoe Association. (2024). "Kayak Fishing Safety and Best Practices." ACA Paddlesports Safety Guidelines.
[2] Marine Electronics Journal. (2025). "Power Management Systems for Kayak Fishing Applications." Vol. 34, Issue 2, pp. 45-62.
<!DOCTYPE html>
<html lang="en">
<head>
<meta charset="UTF-8">
<meta name="viewport" content="width=device-width, initial-scale=1.0">
<title>Interactive Kayak Fishing Setup Builder</title>
<style>
* {
margin: 0;
padding: 0;
box-sizing: border-box;
}
.cg-element-container {
font-family: 'Segoe UI', Tahoma, Geneva, Verdana, sans-serif;
max-width: 1000px;
margin: 20px auto;
padding: 20px;
background: linear-gradient(135deg, #667eea 0%, #764ba2 100%);
border-radius: 15px;
box-shadow: 0 10px 30px rgba(0,0,0,0.3);
}
.cg-element-header {
text-align: center;
color: white;
margin-bottom: 30px;
}
.cg-element-header h1 {
font-size: 28px;
margin-bottom: 10px;
}
.cg-element-header p {
font-size: 16px;
opacity: 0.9;
}
.cg-element-sections {
display: grid;
grid-template-columns: repeat(auto-fit, minmax(280px, 1fr));
gap: 20px;
margin-bottom: 30px;
}
.cg-element-section {
background: white;
border-radius: 10px;
padding: 20px;
box-shadow: 0 4px 6px rgba(0,0,0,0.1);
}
.cg-element-section h3 {
color: #667eea;
margin-bottom: 15px;
font-size: 18px;
border-bottom: 2px solid #667eea;
padding-bottom: 8px;
}
.cg-element-option {
margin: 12px 0;
padding: 10px;
border: 2px solid #e0e0e0;
border-radius: 8px;
cursor: pointer;
transition: all 0.3s ease;
}
.cg-element-option:hover {
border-color: #667eea;
background: #f8f9ff;
}
.cg-element-option.selected {
border-color: #667eea;
background: #e8ecff;
}
.cg-element-option input[type="radio"] {
margin-right: 10px;
}
.cg-element-option-label {
font-weight: 600;
color: #333;
display: block;
margin-bottom: 4px;
}
.cg-element-option-price {
color: #27ae60;
font-weight: bold;
font-size: 14px;
}
.cg-element-option-desc {
font-size: 13px;
color: #666;
margin-top: 4px;
}
.cg-element-summary {
background: white;
border-radius: 10px;
padding: 25px;
box-shadow: 0 4px 6px rgba(0,0,0,0.1);
}
.cg-element-summary h2 {
color: #667eea;
margin-bottom: 20px;
font-size: 24px;
text-align: center;
}
.cg-element-summary-items {
margin-bottom: 20px;
}
.cg-element-summary-item {
display: flex;
justify-content: space-between;
padding: 12px;
margin: 8px 0;
background: #f8f9ff;
border-radius: 6px;
}
.cg-element-summary-item-name {
font-weight: 600;
color: #333;
}
.cg-element-summary-item-price {
color: #27ae60;
font-weight: bold;
}
.cg-element-total {
border-top: 3px solid #667eea;
padding-top: 15px;
margin-top: 15px;
}
.cg-element-total-row {
display: flex;
justify-content: space-between;
font-size: 24px;
font-weight: bold;
color: #667eea;
}
.cg-element-budget-indicator {
margin-top: 20px;
padding: 15px;
border-radius: 8px;
text-align: center;
font-weight: 600;
}
.cg-element-budget-entry {
background: #e8f5e9;
color: #2e7d32;
}
.cg-element-budget-mid {
background: #fff3e0;
color: #e65100;
}
.cg-element-budget-premium {
background: #f3e5f5;
color: #6a1b9a;
}
.cg-element-reset-btn {
display: block;
width: 100%;
padding: 15px;
margin-top: 20px;
background: #667eea;
color: white;
border: none;
border-radius: 8px;
font-size: 16px;
font-weight: 600;
cursor: pointer;
transition: background 0.3s ease;
}
.cg-element-reset-btn:hover {
background: #764ba2;
}
@media (max-width: 768px) {
.cg-element-container {
padding: 15px;
}
.cg-element-header h1 {
font-size: 22px;
}
.cg-element-sections {
grid-template-columns: 1fr;
}
}
</style>
</head>
<body>
<div class="cg-element-container">
<div class="cg-element-header">
<h1>🎣 Build Your Inshore Saltwater Kayak Fishing Setup</h1>
<p>Select your equipment to calculate total investment and see your complete setup</p>
</div>
<div class="cg-element-sections">
<div class="cg-element-section">
<h3>🚣 Kayak Platform</h3>
<div class="cg-element-option" onclick="selectOption('kayak', 'entry', 800)">
<input type="radio" name="kayak" id="kayak-entry">
<label class="cg-element-option-label">Entry-Level Fishing Kayak</label>
<div class="cg-element-option-price">$800</div>
<div class="cg-element-option-desc">Basic features, paddle-powered</div>
</div>
<div class="cg-element-option" onclick="selectOption('kayak', 'mid', 1500)">
<input type="radio" name="kayak" id="kayak-mid">
<label class="cg-element-option-label">Mid-Range Fishing Kayak</label>
<div class="cg-element-option-price">$1,500</div>
<div class="cg-element-option-desc">Enhanced features, better stability</div>
</div>
<div class="cg-element-option" onclick="selectOption('kayak', 'premium', 3000)">
<input type="radio" name="kayak" id="kayak-premium">
<label class="cg-element-option-label">Premium Pedal Drive Kayak</label>
<div class="cg-element-option-price">$3,000</div>
<div class="cg-element-option-desc">Hands-free propulsion, pro features</div>
</div>
</div>
<div class="cg-element-section">
<h3>🎣 Rod & Reel Setup</h3>
<div class="cg-element-option" onclick="selectOption('rods', 'basic', 300)">
<input type="radio" name="rods" id="rods-basic">
<label class="cg-element-option-label">2 Basic Combos</label>
<div class="cg-element-option-price">$300</div>
<div class="cg-element-option-desc">Entry-level spinning combos</div>
</div>
<div class="cg-element-option" onclick="selectOption('rods', 'quality', 750)">
<input type="radio" name="rods" id="rods-quality">
<label class="cg-element-option-label">3 Quality Setups</label>
<div class="cg-element-option-price">$750</div>
<div class="cg-element-option-desc">Mid-range performance rods/reels</div>
</div>
<div class="cg-element-option" onclick="selectOption('rods', 'pro', 1500)">
<input type="radio" name="rods" id="rods-pro">
<label class="cg-element-option-label">4 Professional Setups</label>
<div class="cg-element-option-price">$1,500</div>
<div class="cg-element-option-desc">High-end tournament gear</div>
</div>
</div>
<div class="cg-element-section">
<h3>📟 Electronics</h3>
<div class="cg-element-option" onclick="selectOption('electronics', 'none', 0)">
<input type="radio" name="electronics" id="electronics-none">
<label class="cg-element-option-label">No Electronics</label>
<div class="cg-element-option-price">$0</div>
<div class="cg-element-option-desc">Traditional fishing approach</div>
</div>
<div class="cg-element-option" onclick="selectOption('electronics', 'basic', 400)">
<input type="radio" name="electronics" id="electronics-basic">
<label class="cg-element-option-label">Basic Fish Finder</label>
<div class="cg-element-option-price">$400</div>
<div class="cg-element-option-desc">GPS + basic sonar</div>
</div>
<div class="cg-element-option" onclick="selectOption('electronics', 'advanced', 1200)">
<input type="radio" name="electronics" id="electronics-advanced">
<label class="cg-element-option-label">Advanced Electronics</label>
<div class="cg-element-option-price">$1,200</div>
<div class="cg-element-option-desc">Imaging sonar + mapping</div>
</div>
</div>
<div class="cg-element-section">
<h3>🎒 Tackle & Accessories</h3>
<div class="cg-element-option" onclick="selectOption('tackle', 'starter', 200)">
<input type="radio" name="tackle" id="tackle-starter">
<label class="cg-element-option-label">Starter Tackle Kit</label>
<div class="cg-element-option-price">$200</div>
<div class="cg-element-option-desc">Essential lures & terminal tackle</div>
</div>
<div class="cg-element-option" onclick="selectOption('tackle', 'complete', 500)">
<input type="radio" name="tackle" id="tackle-complete">
<label class="cg-element-option-label">Complete Tackle Collection</label>
<div class="cg-element-option-price">$500</div>
<div class="cg-element-option-desc">Comprehensive lure selection</div>
</div>
<div class="cg-element-option" onclick="selectOption('tackle', 'pro', 1000)">
<input type="radio" name="tackle" id="tackle-pro">
<label class="cg-element-option-label">Professional Tackle Arsenal</label>
<div class="cg-element-option-price">$1,000</div>
<div class="cg-element-option-desc">Tournament-ready tackle</div>
</div>
</div>
<div class="cg-element-section">
<h3>🦺 Safety Equipment</h3>
<div class="cg-element-option" onclick="selectOption('safety', 'basic', 150)">
<input type="radio" name="safety" id="safety-basic">
<label class="cg-element-option-label">Basic Safety Gear</label>
<div class="cg-element-option-price">$150</div>
<div class="cg-element-option-desc">PFD, whistle, first aid</div>
</div>
<div class="cg-element-option" onclick="selectOption('safety', 'complete', 350)">
<input type="radio" name="safety" id="safety-complete">
<label class="cg-element-option-label">Complete Safety Package</label>
<div class="cg-element-option-price">$350</div>
<div class="cg-element-option-desc">Quality PFD, VHF radio, PLB</div>
</div>
</div>
<div class="cg-element-section">
<h3>🔧 Rigging & Accessories</h3>
<div class="cg-element-option" onclick="selectOption('rigging', 'minimal', 150)">
<input type="radio" name="rigging" id="rigging-minimal">
<label class="cg-element-option-label">Minimal Rigging</label>
<div class="cg-element-option-price">$150</div>
<div class="cg-element-option-desc">Basic rod holders & anchor</div>
</div>
<div class="cg-element-option" onclick="selectOption('rigging', 'standard', 400)">
<input type="radio" name="rigging" id="rigging-standard">
<label class="cg-element-option-label">Standard Rigging Package</label>
<div class="cg-element-option-price">$400</div>
<div class="cg-element-option-desc">Multiple holders, tracks, lighting</div>
</div>
<div class="cg-element-option" onclick="selectOption('rigging', 'complete', 800)">
<input type="radio" name="rigging" id="rigging-complete">
<label class="cg-element-option-label">Complete Rigging System</label>
<div class="cg-element-option-price">$800</div>
<div class="cg-element-option-desc">Full track systems, premium accessories</div>
</div>
</div>
</div>
<div class="cg-element-summary">
<h2>📊 Your Setup Summary</h2>
<div class="cg-element-summary-items" id="summary-items">
<p style="text-align: center; color: #666; padding: 20px;">Select options above to build your setup</p>
</div>
<div class="cg-element-total">
<div class="cg-element-total-row">
<span>Total Investment:</span>
<span id="total-price">$0</span>
</div>
</div>
<div id="budget-indicator"></div>
<button class="cg-element-reset-btn" onclick="resetCalculator()">🔄 Reset Calculator</button>
</div>
</div>
<script>
const selections = {
kayak: { name: '', price: 0 },
rods: { name: '', price: 0 },
electronics: { name: '', price: 0 },
tackle: { name: '', price: 0 },
safety: { name: '', price: 0 },
rigging: { name: '', price: 0 }
};
const itemNames = {
kayak: {
entry: 'Entry-Level Fishing Kayak',
mid: 'Mid-Range Fishing Kayak',
premium: 'Premium Pedal Drive Kayak'
},
rods: {
basic: '2 Basic Rod/Reel Combos',
quality: '3 Quality Rod/Reel Setups',
pro: '4 Professional Rod/Reel Setups'
},
electronics: {
none: 'No Electronics',
basic: 'Basic Fish Finder',
advanced: 'Advanced Electronics Package'
},
tackle: {
starter: 'Starter Tackle Kit',
complete: 'Complete Tackle Collection',
pro: 'Professional Tackle Arsenal'
},
safety: {
basic: 'Basic Safety Gear',
complete: 'Complete Safety Package'
},
rigging: {
minimal: 'Minimal Rigging',
standard: 'Standard Rigging Package',
complete: 'Complete Rigging System'
}
};
function selectOption(category, option, price) {
// Update radio button
document.getElementById(`${category}-${option}`).checked = true;
// Update selections
selections[category] = {
name: itemNames[category][option],
price: price
};
// Update visual selection
const categoryOptions = document.querySelectorAll(`input[name="${category}"]`).forEach(input => {
input.parentElement.classList.remove('selected');
});
document.getElementById(`${category}-${option}`).parentElement.classList.add('selected');
updateSummary();
}
function updateSummary() {
const summaryItems = document.getElementById('summary-items');
const totalPrice = document.getElementById('total-price');
const budgetIndicator = document.getElementById('budget-indicator');
let html = '';
let total = 0;
let hasSelections = false;
for (const [category, data] of Object.entries(selections)) {
if (data.name) {
hasSelections = true;
html += `
<div class="cg-element-summary-item">
<span class="cg-element-summary-item-name">${data.name}</span>
<span class="cg-element-summary-item-price">$${data.price.toLocaleString()}</span>
</div>
`;
total += data.price;
}
}
if (!hasSelections) {
summaryItems.innerHTML = '<p style="text-align: center; color: #666; padding: 20px;">Select options above to build your setup</p>';
totalPrice.textContent = '$0';
budgetIndicator.innerHTML = '';
return;
}
summaryItems.innerHTML = html;
totalPrice.textContent = `$${total.toLocaleString()}`;
// Update budget indicator
let budgetClass = '';
let budgetText = '';
if (total < 2500) {
budgetClass = 'cg-element-budget-entry';
budgetText = '💚 Entry-Level Budget Setup';
} else if (total < 4500) {
budgetClass = 'cg-element-budget-mid';
budgetText = '🧡 Mid-Range Performance Setup';
} else {
budgetClass = 'cg-element-budget-premium';
budgetText = '💜 Premium Tournament-Ready Setup';
}
budgetIndicator.innerHTML = `<div class="cg-element-budget-indicator ${budgetClass}">${budgetText}</div>`;
}
function resetCalculator() {
// Clear all selections
for (const category in selections) {
selections[category] = { name: '', price: 0 };
}
// Uncheck all radio buttons
document.querySelectorAll('input[type="radio"]').forEach(input => {
input.checked = false;
input.parentElement.classList.remove('selected');
});
updateSummary();
}
</script>
</body>
</html>


