Last updated: February 21, 2026
Key Takeaways
- Sharpening power ice auger blades at home takes about 20 minutes per blade and requires a flat whetstone, honing oil, and a consistent hand angle.
- Matching the factory blade angle (typically 28 to 45 degrees) determines both cutting speed and edge longevity.
- Sharp blades reduce drilling effort by 50 to 70 percent and prevent excess strain on your auger's motor or battery.
- Home sharpening costs under $30 in supplies versus $15 to $30 per professional service visit, making the DIY approach far more economical over a full season.
- A simple fingernail test confirms when your edge is sharp enough to drill clean holes through thick ice.
Quick Answer

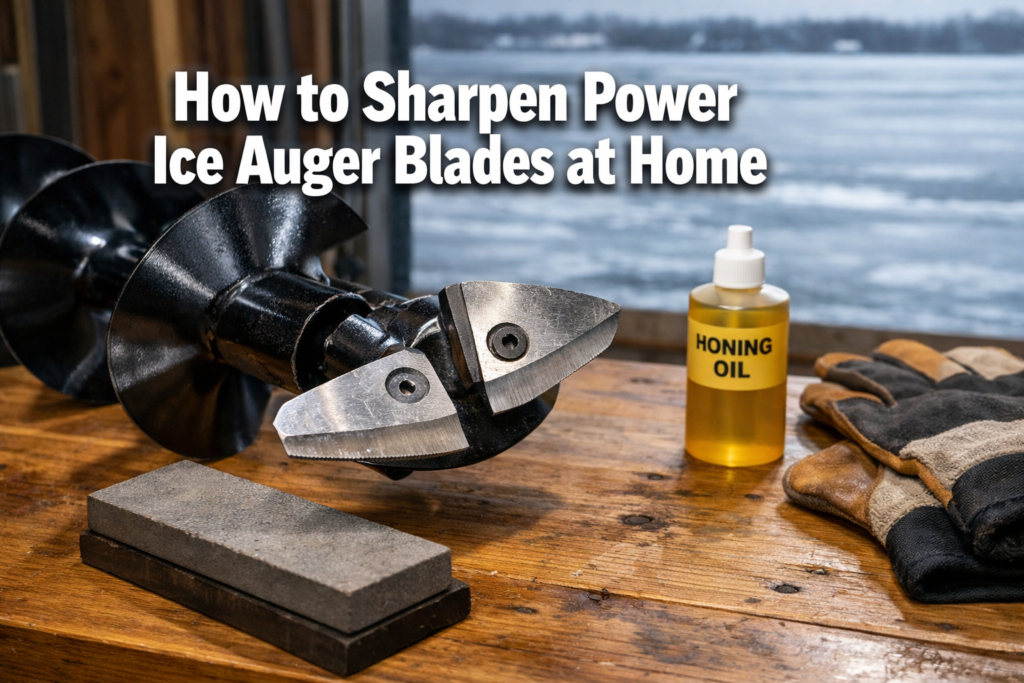
Learning how to sharpen power ice auger blades at home saves money and keeps your drilling performance consistent all season. Remove the blades from the auger head, secure them in a vise or flat surface, and use a flat whetstone or fine file to restore the factory bevel angle with smooth, even strokes. The entire process takes about 20 minutes per blade. You need a whetstone (1000-grit minimum), honing oil or water, a permanent marker, and cut-resistant gloves.
Why Sharp Ice Auger Blades Matter More Than You Think
Dull auger blades turn a 20-second drill into a 10-minute ordeal. That difference matters when you're burning daylight on hard water and need to punch multiple holes to locate fish.
Sharp blades bite into ice immediately and produce clean, smooth holes. Dull blades skip, chatter, and force your auger motor to work harder. On electric models, this drains the battery faster and reduces the number of holes per charge. Battery-powered augers now drill 70 to 100 holes per charge with sharp blades. Dull blades cut that number significantly.
The strain goes beyond batteries. A gas-powered auger with dull blades overheats faster and wears internal components. One documented case showed a used Mora ice auger's cutting time dropped from 10 minutes to under 30 seconds after a proper DIY sharpening session. That kind of performance gap affects your entire day on the ice.
Electric auger sales have surged over 340 percent in the past five years, and electric models now account for roughly 60 percent of new auger purchases. With more anglers running battery-powered setups, blade maintenance has become a core skill for the multi-season adventurer. Replacing blades every time they dull gets expensive. A single replacement blade set runs $20 to $50 depending on the brand. Sharpening at home costs a fraction of that.
If you're the type who takes pride in maintaining your own gear, this falls right in line with the hands-on approach we value at FishOnYak. Kayak. Drill. Catch. Repeat.
How to Tell When Your Ice Auger Blades Need Sharpening

Your blades will tell you when they're dull. You don't need a microscope. Pay attention to these signs during your next outing.
Performance signs of dull blades:
- The auger chatters or vibrates excessively instead of cutting smoothly
- You need to apply heavy downward pressure to get the blades to bite
- Ice shavings come out as powder or slush instead of clean chips
- Drilling takes noticeably longer than when the blades were new
- The motor sounds strained or the battery drains faster than normal
- The hole edges are rough and jagged instead of smooth
Visual inspection signs:
- Run your thumb gently across the blade edge (perpendicular to the edge, never along the edge). A sharp blade catches slightly on your skin. A dull blade feels smooth and rounded.
- Hold the blade up to light. A dull edge reflects light along the cutting edge because the metal has rounded over. A sharp edge is too thin to reflect light.
- Look for nicks, chips, or rolled sections along the cutting edge. Even small imperfections cause the blade to skip on ice.
Common mistake: Many anglers blame their auger motor or battery when the real problem is blade condition. Sharp blades solve roughly 80 percent of auger performance issues immediately.
When to sharpen versus replace: Sharpen blades that have general dullness, minor nicks, or a slightly rolled edge. Replace blades that have large chips, cracks, significant corrosion, or a visibly bent profile. Attempting to sharpen a cracked blade creates a safety hazard.
Tools and Materials You Need to Sharpen Power Ice Auger Blades at Home
Gather your supplies before you start. Having everything within reach keeps the process efficient and safe.
| Tool / Material | Purpose | Estimated Cost |
|---|---|---|
| Flat whetstone (1000-grit and 3000-grit minimum) | Primary sharpening and edge refinement | $15 to $25 |
| Honing oil or water | Lubrication during sharpening to prevent metal buildup | $5 to $10 |
| Permanent marker (fine tip) | Mark the bevel to track sharpening progress | $2 |
| Cut-resistant gloves | Hand protection while handling sharp blades | $10 to $15 |
| Allen wrench set or screwdriver | Blade removal from auger head | Already owned |
| Small vise or clamp (optional) | Secure the blade during sharpening | $10 to $20 |
| Microfiber cloth | Cleaning blades before and after sharpening | $3 |
| Fine diamond file (optional) | Removing larger nicks before whetstone work | $8 to $15 |
| Blade angle guide (optional) | Maintaining consistent bevel angle | $10 to $20 |
Total estimated cost for a full sharpening kit: $25 to $50. This kit lasts for years of sharpening sessions.
Choose a whetstone if you want the finest edge and plan to sharpen regularly. Choose a diamond file if your blades have visible nicks that need material removed before refinement.
For anglers who want to progress from a 3000-grit finish to a mirror-polished edge, stones up to 8000-grit produce an extremely refined cutting surface. This level of polish is not required for functional sharpness, but some anglers prefer the extra refinement for maximum bite on the first rotation.
Check out the FishOnYak blog for more gear maintenance guides that keep your equipment tournament-ready.
How to Sharpen Power Ice Auger Blades at Home: Step-by-Step Process

Follow these steps in order. Rushing through any step compromises the final edge quality.
Step 1: Remove the Blades Safely
- Disconnect the auger from its power source. For electric models, remove the battery. For gas models, disconnect the spark plug wire.
- Place the auger on a stable surface with the blade end accessible.
- Put on cut-resistant gloves before touching the blades.
- Locate the blade mounting bolts. Most power augers use two bolts per blade, typically Allen head or Phillips head screws.
- Loosen and remove the bolts. Keep them in a small container so they don't get lost.
- Carefully lift each blade off the auger head. Note the blade orientation and which side faces up. Take a photo with your phone for reference during reassembly.
Common mistake: Forgetting blade orientation during removal. Reinstalling blades upside down or reversed prevents them from cutting and damages the auger head.
Step 2: Clean and Inspect the Blades
- Wipe each blade with a microfiber cloth to remove ice residue, dirt, and surface rust.
- For stubborn corrosion, use a light application of rust remover or white vinegar. Let the blade sit for five minutes, then wipe clean.
- Inspect the entire cutting edge under good lighting. Identify nicks, chips, and the overall condition of the bevel.
- Check the blade for cracks or bends. A cracked blade should be replaced, not sharpened.
Step 3: Identify and Mark the Bevel Angle
This step separates a good sharpening job from a bad one. Matching the original blade angle is the single most important factor in the outcome.
- Look at the factory bevel on the blade. Most power ice auger blades have a single bevel ground at an angle between 28 and 45 degrees.
- Use a permanent marker to color the entire bevel surface. This ink acts as a visual guide. As you sharpen, the marker disappears where the stone contacts the blade. If the marker only disappears on one side of the bevel, your angle is off.
- A 28-degree angle produces a sharper, more aggressive edge that bites into ice quickly but dulls faster. A 40 to 45-degree angle produces a more durable edge that lasts longer but requires slightly more pressure to start cutting.
Choose a steeper angle (40 to 45 degrees) if you fish frequently and want longer intervals between sharpening sessions. Choose a shallower angle (28 to 35 degrees) if you prioritize maximum cutting speed and don't mind sharpening more often.
Step 4: Sharpen the Blade
- Soak your whetstone in water for 5 to 10 minutes (for water stones) or apply honing oil to the surface (for oil stones).
- Place the stone on a flat, stable surface. A damp towel underneath prevents the stone from sliding.
- Position the blade bevel-side down on the stone at the factory angle. The marker line on the bevel helps you find the correct angle.
- Apply light, even pressure. Push the blade across the stone in smooth, forward strokes. Maintain the same angle throughout each stroke.
- Complete 10 to 15 strokes, then check the marker. If the marker is wearing evenly across the entire bevel, your angle is correct. Adjust if needed.
- Continue sharpening with 10-stroke sets until the marker is completely removed and you feel a slight burr forming on the back side of the blade.
- If you started on a 1000-grit stone, switch to a 3000-grit stone and repeat the process with lighter pressure. This refines the edge and removes the scratches left by the coarser stone.
- For an even finer edge, progress to higher grits (6000 to 8000). Each grit level polishes the bevel further.
Total sharpening time per blade: approximately 10 to 20 minutes depending on how dull the blade was and how many grit levels you use.
Step 5: Remove the Burr
- Flip the blade over so the flat (non-bevel) side faces the stone.
- Lay the flat side completely flush against the stone surface. Do not lift the blade at an angle.
- Make 3 to 5 light passes across the stone. This removes the metal burr that formed during sharpening.
- Alternate: one stroke on the bevel side, one stroke on the flat side. Repeat 2 to 3 times. This produces a clean, refined edge.
Step 6: Test the Edge
Three reliable tests confirm your blade is sharp enough for the ice:
- Fingernail test: Rest the blade edge gently on your fingernail at a slight angle. A sharp blade catches and digs in. A dull blade slides off.
- Paper test: Hold a sheet of paper vertically and draw the blade through the edge. A sharp blade slices cleanly. A dull blade tears or folds the paper.
- Visual test: Hold the edge toward a light source. A sharp edge disappears into the light. A dull edge reflects a visible line of light.
If the blade passes all three tests, the edge is ready for the ice.
For more practical, hands-on guides like this, explore our practice resources designed for anglers who want to build real skills.
Common Mistakes When Sharpening Ice Auger Blades (and How to Avoid Them)
Even experienced DIY riggers make these errors. Knowing them in advance saves time and protects your blades.
Changing the factory bevel angle. This is the most frequent mistake. Sharpening at a steeper or shallower angle than the original bevel creates an uneven edge that cuts poorly. Always use the marker trick described above to verify your angle.
Applying too much pressure. Heavy pressure removes too much metal, shortens blade life, and creates an uneven bevel. Let the stone do the work. Light, consistent pressure produces better results.
Using a rounded or worn stone. A whetstone that has developed a concave surface from repeated use will round your blade edge instead of keeping the bevel flat. Flatten your stone periodically using a flattening plate or by rubbing two stones together.
Skipping the burr removal step. A burr left on the blade edge folds over during drilling and makes the blade feel dull almost immediately. Always deburr both sides after sharpening.
Sharpening both sides of a single-bevel blade. Most ice auger blades have a bevel on one side and a flat surface on the other. Sharpening the flat side at an angle creates a double bevel that changes how the blade interacts with ice. Keep the flat side flat.
Not cleaning blades before sharpening. Dirt, rust, and ice residue contaminate your whetstone and create an inconsistent sharpening surface. Always clean blades thoroughly before starting.
Reassembling blades at incorrect torque. Over-tightening blade bolts warps the blade. Under-tightening allows the blade to shift during drilling. Follow your auger manufacturer's torque specifications. If you don't have a torque wrench, tighten bolts firmly but stop when you feel solid resistance.
How to Maintain Sharp Blades Between Sharpening Sessions

Sharpening is one part of the equation. Proper maintenance between sessions extends the time between sharpening and protects your investment.
After every use:
- Wipe blades dry with a clean cloth immediately after fishing. Moisture left on blades causes rust and pitting.
- Apply a thin coat of light machine oil or blade protectant to the cutting edge and blade surface.
- Install blade guards or covers before storing the auger.
Storage best practices:
- Store your auger in a dry location. Avoid leaving the auger in a cold, damp garage or truck bed where condensation forms on the blades.
- Never lay the auger on the ground blade-first. Contact with rocks, gravel, or concrete dulls the edge instantly.
- Keep blade guards on at all times when the auger is not in active use.
On the ice:
- Avoid drilling into sand, gravel, or the lake bottom. Hitting the substrate under the ice is the fastest way to destroy a sharp edge.
- Clear slush and refrozen ice from previously drilled holes before re-drilling. Refrozen ice is often mixed with debris that damages blades.
- Carry a small diamond sharpening rod in your gear bag for quick touch-ups on the ice. A few light strokes restore the edge between full sharpening sessions.
Decision rule: If your blades need more than a quick touch-up after every outing, the edge geometry has likely changed and a full sharpening session at home is needed.
For more tips on keeping your gear in peak condition across seasons, visit the FishOnYak homepage for the latest guides.
Home Sharpening vs. Professional Sharpening vs. Blade Replacement: Which Should You Choose?
| Factor | Home Sharpening | Professional Sharpening | Blade Replacement |
|---|---|---|---|
| Cost per session | $0 (after initial $25 to $50 kit) | $15 to $30 per blade set | $20 to $50 per blade set |
| Time | 20 to 40 minutes | Travel time plus service wait | 5 minutes to install |
| Skill required | Moderate (learnable in one session) | None | None |
| Edge quality | Good to excellent with practice | Excellent (machine-ground) | Factory-new |
| Best for | Frequent anglers, DIY riggers | Anglers who want precision without effort | Blades with chips, cracks, or heavy damage |
| Availability | Anytime, at home | Limited by shop hours and location | Dependent on stock and shipping |
Choose home sharpening if you fish more than 5 to 10 times per season and want to maintain your blades between outings without recurring costs. The initial investment in a sharpening kit pays for itself after two sessions compared to professional service.
Choose professional sharpening if your blades have significant damage that requires machine grinding to restore the bevel, or if you prefer a hands-off approach.
Choose blade replacement if the blades have cracks, deep chips, or corrosion that has compromised the metal integrity. No amount of sharpening fixes structural damage.
The multi-season adventurer who transitions between saltwater kayak fishing and ice fishing benefits most from learning home sharpening. The skill transfers across gear types and keeps you self-sufficient in the field.
Sharpening Different Blade Types: Flat vs. Curved vs. Chipper

Different blade designs require slightly different approaches. Know your blade type before you start.
Flat blades (found on most Jiffy, Eskimo, and StrikeMaster models): These are the easiest to sharpen at home. The flat cutting surface sits flush against a flat whetstone, making angle maintenance straightforward. Follow the standard process described above.
Curved blades (found on some Mora and newer StrikeMaster models): These require more care. The curved profile means different sections of the blade contact the stone at different points. Sharpen in short, controlled strokes, following the curve of the blade. A flat stone still works, but you need to rock the blade slightly to match the curve as you stroke.
Chipper-style blades (found on older hand auger designs, occasionally on power models): These have a more aggressive tooth pattern. A small, fine file works better than a whetstone for chipper blades. File each tooth individually, maintaining the original angle on each cutting point.
Edge case: Some premium auger brands use proprietary blade coatings (titanium, ceramic, or similar). Sharpening these blades with a standard whetstone removes the coating from the cutting edge. Check your manufacturer's guidelines before sharpening coated blades. In most cases, the underlying steel sharpens normally once the coating wears off the edge.
Actionable Next Steps
Take these steps before your next trip on the ice:
- Remove your auger blades tonight and inspect them under good light. Use the marker test to identify the current bevel angle.
- Order a dual-grit whetstone (1000/3000) and cut-resistant gloves if you don't already own them.
- Practice the sharpening technique on one blade first. Test the edge before moving to the second blade.
- Apply a thin coat of oil to both blades and install blade guards before storage.
- Keep a small diamond rod in your ice fishing gear bag for quick field touch-ups.
- Revisit your blade condition every 3 to 5 outings and sharpen as needed.
Blade maintenance is a core part of staying tournament-ready on the ice. Sharp blades mean faster holes, longer battery life, and more time fishing. Build this skill once, and you carry the advantage for every season ahead.
Check out the FishOnYak services page for coaching and resources that sharpen more than your blades.
See you on the water.
Frequently Asked Questions
How often should you sharpen ice auger blades? Sharpen after every 3 to 5 full days of drilling, or whenever you notice increased resistance, chattering, or rough hole edges. Frequency depends on ice conditions and how many holes you drill per outing.
What grit whetstone works best for ice auger blades? Start with a 1000-grit stone to reshape the edge, then move to a 3000-grit stone to refine the bevel. Stones up to 8000-grit produce a polished edge but are not required for functional sharpness.
Do you sharpen both sides of an ice auger blade? No. Most power ice auger blades have a single bevel. Sharpen only the beveled side. Keep the flat side flat by making a few light passes flush against the stone to remove the burr.
What angle should ice auger blades be sharpened at? Match the factory angle, which typically ranges from 28 to 45 degrees depending on the manufacturer. A 28-degree angle cuts aggressively but dulls faster. A 40 to 45-degree angle lasts longer between sharpening sessions.
Is sharpening ice auger blades at home worth the effort? Yes. Professional sharpening costs $15 to $30 per visit. A home sharpening kit costs $25 to $50 and lasts for years. If you fish more than a few times per season, home sharpening saves money quickly.
Will sharpening void my auger blade warranty? Some manufacturers void blade warranties if blades show signs of aftermarket sharpening. Check your warranty terms before sharpening. In most cases, blades are considered consumable parts with limited or no warranty coverage.
How do you sharpen curved ice auger blades? Use the same whetstone technique but follow the curve of the blade with shorter strokes. Rock the blade slightly as you move across the stone to maintain contact along the entire curved edge.
What is the fingernail test for blade sharpness? Rest the blade edge lightly on your fingernail at a slight angle. A sharp blade catches and holds its position. A dull blade slides off the nail without catching.
Should you use water or oil on a sharpening stone for auger blades? Use water on water stones (most Japanese-style whetstones) and honing oil on oil stones (most Arkansas and India stones). Using the wrong lubricant clogs the stone's pores and reduces sharpening effectiveness.
How long does a home sharpening session take? Expect 10 to 20 minutes per blade, or 20 to 40 minutes for a complete two-blade set. This includes cleaning, marking, sharpening through multiple grits, deburring, and testing.
What causes ice auger blades to dull quickly? Hitting sand, gravel, or the lake bottom is the primary cause. Drilling through refrozen slush mixed with debris also accelerates dulling. Improper storage without blade guards and moisture exposure contribute to edge degradation.
Are replacement blades better than sharpened blades? New blades have a factory-ground edge that is consistent and precise. A well-sharpened blade performs comparably for drilling purposes. Replace blades only when they have structural damage like cracks, deep chips, or warping.


