Last updated: March 16, 2026
Quick Answer
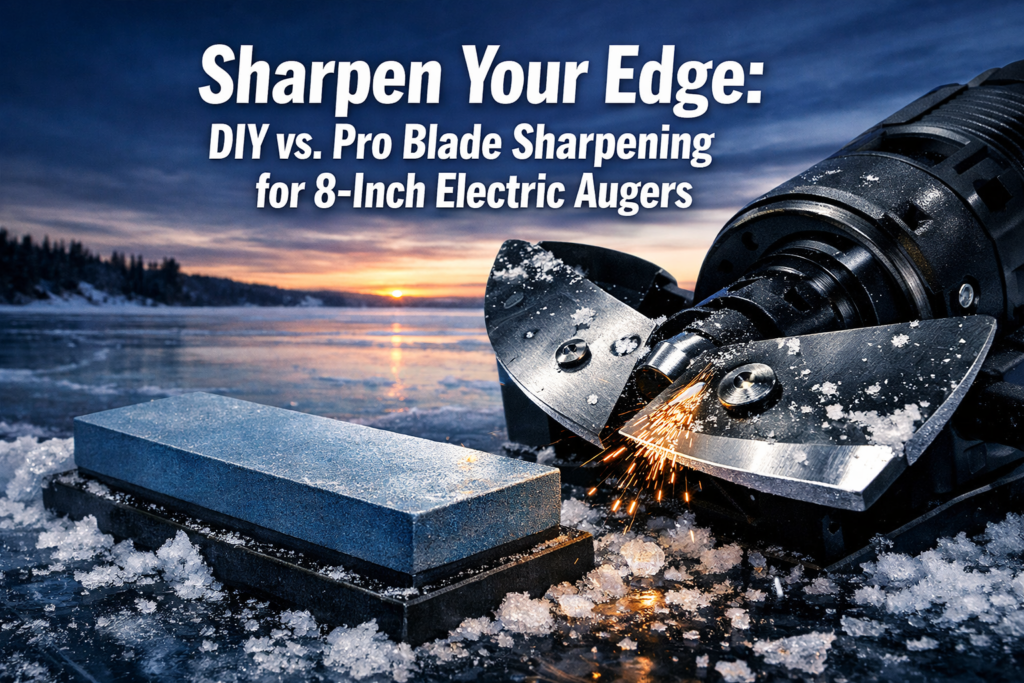
When evaluating Blade Sharpening Techniques for 8-Inch Electric Augers, the choice between DIY and professional care depends on the blade's condition:
- The DIY Advantage: Best for the “serious angler” who maintains gear weekly. Using a $38^\circ$ to $40^\circ$ angle guide ensures that your electric motor doesn't overwork, preserving battery life. It is the most effortless way to stay sharp without the downtime of shipping blades.
- The Professional Advantage: Professional sharpening is the ultimate solution for blades with “rolled edges” or inconsistent geometry. High-torque 8-inch electric augers are sensitive to blade pitch; a professional ensures both blades are perfectly symmetrical to prevent “auger walk” or excessive vibration.
Pro Tip: If you can’t shave a hair off your arm with the blade, it’s too dull for an electric auger. Dull blades increase resistance, which drains your lithium battery up to 30% faster.
Key Takeaways
- Dull blades force your electric auger motor to work harder, draining battery faster and reducing hole count per charge.
- The correct primary edge angle for ice auger blades is 38 to 40 degrees, though 32 to 42 degrees works in practice.
- DIY sharpening tools include whetstones, diamond files, and wet/dry sandpaper. Each suits a different level of blade damage.
- Professional sharpening machines produce consistent, razor-sharp edges that are difficult to match by hand.
- Professional turnaround runs 9 to 12 business days at authorized dealers, so plan ahead before the season.
- Sharpening costs roughly 50 to 56% of the price of a new blade set. Blades tolerate 5 to 7 sharpening cycles with proper care.
- DIY fails when blade geometry is off. Inconsistent angles create a wavy edge that cuts poorly even after sharpening.
- Replacement beats sharpening only when the blade body is cracked, deeply gouged, or bent beyond repair.

Why Sharp Blades Matter for 8-Inch Electric Augers
Sharp blades are the difference between a clean, fast hole and a grinding battle that kills your battery. An 8-inch electric auger running dull blades draws more amperage to maintain torque, which shortens your runtime per charge and generates excess heat in the motor.
The global electric ice auger market reached approximately $0.7 billion in 2026, driven by advances in brushless motor technology and high-capacity battery systems. Those improvements only pay off when the blades feeding the motor are doing their job. A sharp blade requires less force, which means more holes drilled per battery charge and less wear on your drivetrain.
For multi-season anglers who fish hard ice from December through March, blade maintenance is as routine as checking your line or charging your battery. If you want a deeper look at how electric auger technology compares to gas alternatives, read our Electric vs. Gas Ice Auger Pros and Cons for Beginners guide.
How to Tell When Your 8-Inch Auger Blades Need Sharpening
Blades need sharpening when cutting performance drops noticeably. You do not need to wait for complete failure.
Watch for these signs:
- The auger takes longer to drill through the same ice thickness compared to earlier in the season.
- The motor sounds like it is straining or the drill slows mid-hole.
- Ice shavings look crushed or powdery instead of clean chips.
- You feel vibration or chatter through the handle during drilling.
- A fingernail dragged across the blade edge catches without resistance (a sharp edge bites into the nail).
Check blades visually after every 20 to 30 holes drilled through hard, clear ice. Sandy or gritty ice at the surface dulls blades faster. Hitting rocks, gravel, or the lake bottom once is enough to roll or nick an edge.
Razor Ice Auger's maintenance guidance notes that flat blade systems show wear at the cutting edge first, and that a blade dragged across a fingernail should catch if it is still sharp. If it slides cleanly, it is time to sharpen or replace.
DIY Blade Sharpening Techniques for 8-Inch Electric Augers
DIY sharpening works well for blades with light to moderate dullness and no structural damage. The key is maintaining consistent blade angle throughout the process.

Tools You Need
- Whetstone (400 to 600 grit for sharpening, 1000 grit for finishing)
- Diamond file (flat, medium grit)
- Wet/dry sandpaper (320 to 600 grit on a flat backing)
- Blade angle guide or protractor
- Blade removal tool or appropriate wrench
- Clean cloth and honing oil or water
Step-by-Step DIY Process
- Remove the blades from the auger head. Always work with blades off the unit for safety and accuracy.
- Inspect each blade under good light. Look for nicks, chips, or rolled sections. Mark any problem areas.
- Set your target angle. The primary edge should sit between 38 and 40 degrees for the best balance of sharpness and edge retention. Use a protractor or angle guide to confirm before you begin.
- Start with the whetstone or diamond file on the flat bevel face of the blade. Hold the angle consistent and use smooth, forward strokes across the stone. Do not rock the blade.
- Work from heel to tip in one direction. Count your strokes and match them on each blade to keep both blades even.
- Switch to finer grit (1000 grit stone or 600 grit sandpaper) to refine the edge.
- Deburr the back face of the blade with two to three light passes on the flat stone to remove the wire edge.
- Test sharpness with the fingernail drag test. A sharp edge bites in immediately.
- Reinstall blades and hand-tighten to manufacturer torque specs.
Which Tool Works Best?
| Tool | Best For | Skill Level | Cost |
|---|---|---|---|
| Whetstone | Light dullness, fine finishing | Beginner to intermediate | $10 to $20 |
| Diamond file | Moderate dullness, minor nicks | Intermediate | $15 to $25 |
| Wet/dry sandpaper | Budget option, light touch-ups | Beginner | $5 to $10 |
| Angle grinder | Severe damage, heavy metal removal | Advanced only | $40 to $80+ |
A recent tutorial published in March 2026 demonstrates the whetstone approach actively promoted to consumers, confirming this method remains the most accessible entry point for DIY sharpening.
For a detailed walkthrough with photos, see our guide on How to Sharpen Power Ice Auger Blades at Home.
Common DIY Mistakes
- Inconsistent angle: Even a 5-degree variation across a stroke creates a wavy edge that performs worse than a dull but consistent one.
- Sharpening only one blade: Uneven blades cause the auger to wobble and cut off-center.
- Skipping deburring: A wire edge folds over on first contact with ice and kills sharpness immediately.
- Using a rotary tool freehand: Without a jig, rotary tools remove metal unevenly and can destroy blade geometry in seconds.
Professional Blade Sharpening Services: What You Get and What It Costs

Professional sharpening is the right call when blades have nicks, inconsistent geometry, or when you want guaranteed factory-level results before a tournament or a long trip.
What Professional Services Deliver
Authorized sharpening services use machines built specifically for ice auger blade profiles. FISH307.com, an authorized RAZR Ice Auger dealer, operates a professional sharpening service using state-of-the-art machines that produce precise, razor-sharp edges consistently, with a turnaround of 9 to 12 business days. That is the standard to expect from a quality service.
Factory-authorized sharpeners work to the original blade geometry rather than guessing at the angle. According to D Mello Knives, a factory-authorized Nils master auger head sharpener with five years of experience, professional sharpening is performed on machines designed specifically for ice auger blades rather than by hand, ensuring factory razor-sharp cutting edges.
Scott's Lawn & Garden Tool Sharpening Service highlights over 10 years of experience in ice auger blade sharpening and promotes fast turnaround as a competitive advantage.
Typical Professional Sharpening Costs
| Service Type | Estimated Cost | Turnaround |
|---|---|---|
| Local sharpening shop | $15 to $25 per set | 1 to 5 business days |
| Mail-in authorized dealer | $20 to $40 per set | 9 to 12 business days [6] |
| Factory-authorized specialist | $25 to $45 per set | Varies |
Lakes Area Sharpening publishes specific pricing for ice auger blades as part of their service menu. Prices vary by blade count and condition.
When to Choose Professional Over DIY
Choose professional sharpening when:
- The blade has visible nicks or chips deeper than 1mm.
- The cutting edge has a rolled or folded section from hitting bottom.
- Your DIY attempt produced a blade that still cuts poorly.
- You are preparing for a tournament and need guaranteed consistency.
- You lack the tools or time to sharpen accurately.
DIY vs. Professional Services: Full Cost Analysis
Sharpening costs roughly 50 to 56% of the price of a new blade set. Blades tolerate 5 to 7 sharpening cycles with proper maintenance before replacement makes more economic sense.
Five-Season Cost Comparison (Estimate)
Assumptions: Two sharpening sessions per season, one blade set per auger.
| Approach | Year 1 | Years 2 to 5 (per year) | 5-Year Total (est.) |
|---|---|---|---|
| DIY (tools + time) | $25 to $40 | $0 to $5 (consumables) | $45 to $60 |
| Professional (mail-in) | $25 to $40 | $25 to $40 | $125 to $200 |
| Blade replacement (new set) | $40 to $80 | $40 to $80 | $200 to $400 |
DIY wins on cost over multiple seasons if you maintain consistent technique. Professional services cost more per cycle but deliver reliable results without skill requirements. Replacement is the most expensive long-term option and is only justified when blades are physically damaged beyond sharpening.
If you are investing in a high-performance setup, pair sharp blades with the right auger. Our Eskimo Outbreak 450XD vs. StrikeMaster 40V Maven Auger comparison breaks down which electric auger delivers the best value for serious hardwater anglers.
For anglers running deep ice, check our guide on the Best Electric Ice Auger for 30-Inch Ice to match your blade maintenance routine to the right machine.
When DIY Sharpening Fails and What to Do Next
DIY sharpening fails in three specific situations. Knowing them saves you time and protects your blades.

Situation 1: Inconsistent edge angle. If you cannot hold a steady 38 to 40 degree angle by hand, the edge becomes convex or concave. The result is a blade that skates across ice instead of biting in. Solution: use an angle guide jig or send the blade to a professional.
Situation 2: Nicks and chips. A whetstone removes metal slowly. A 1mm nick requires removing a matching amount of metal across the entire edge to restore a flat profile. That process takes significant time and skill by hand. A professional sharpening machine removes material evenly and quickly.
Situation 3: Blade geometry damage. If the blade body is bent or the bevel face is warped, no amount of edge work fixes the root problem. Inspect the blade flat on a surface. Any rocking motion means the blade is bent. Replace it.
The Meat Eater's video guide on ice auger blade sharpening demonstrates these failure points and shows what a correctly sharpened edge looks like before reinstallation.
For off-season storage tips that protect your blades between sharpening cycles, read our Gas Ice Auger Off-Season Storage Maintenance Checklist. The principles apply equally to electric auger blade storage.
FAQ: Blade Sharpening for 8-Inch Electric Augers
Q: How often should I sharpen my 8-inch electric auger blades? Sharpen after every 30 to 50 holes drilled in hard, clear ice, or immediately after hitting bottom or rocky substrate. Check blades with the fingernail test before each outing.
Q: What is the correct sharpening angle for ice auger blades? The ideal primary edge angle is 38 to 40 degrees. Angles between 32 and 42 degrees work, but 38 to 40 degrees balances sharpness with edge durability.
Q: Can I use a regular knife sharpener on auger blades? No. Knife sharpeners set angles for kitchen blades, typically 15 to 25 degrees. Using one on an auger blade changes the geometry and ruins cutting performance.
Q: How many times can I sharpen a blade before replacing it? Blades tolerate 5 to 7 sharpening cycles with proper maintenance. Each cycle removes a small amount of metal. Once the bevel face becomes too narrow to hold an edge, replace the blade.
Q: Is professional sharpening worth it for a beginner? Yes. If you are new to blade maintenance, one professional sharpening gives you a reference point for what a correctly sharpened blade feels and performs like. That baseline helps you evaluate your own DIY work going forward.
Q: How long does professional sharpening take? Mail-in services at authorized dealers like FISH307.com take 9 to 12 business days. Local shops often turn blades around in 1 to 5 business days.
Q: Does blade sharpening affect battery life on my electric auger? Yes, directly. Sharp blades require less motor torque to cut through ice, which draws less current from the battery. You drill more holes per charge with sharp blades than dull ones.
Q: What sandpaper grit works for auger blade touch-ups? 320 to 400 grit on a flat backing for light sharpening. Finish with 600 grit to refine the edge. Always work on a flat surface to maintain consistent blade geometry.
Q: Should I oil my blades after sharpening? Apply a light coat of mineral oil or blade oil to the sharpened edge before storage. This prevents oxidation and keeps the metal from corroding between seasons.
Q: When should I replace blades instead of sharpening? Replace blades when the body is cracked, bent, or deeply gouged. Replace when the bevel face is too narrow to hold an edge after repeated sharpening cycles.
Conclusion
Blade sharpening is one of the highest-return maintenance tasks for any 8-inch electric auger owner. Sharp blades cut faster, protect your motor, and extend battery life on every trip. DIY sharpening with a whetstone or diamond file at the correct 38 to 40 degree angle handles most routine maintenance for $15 to $30 in tools. Professional services cost $20 to $40 per session and deliver machine-precision results when DIY is not enough.
Here are your next steps:
- Remove your blades today and run the fingernail test.
- If they pass, clean and oil them for storage.
- If they fail, assess the damage. Light dullness means DIY. Nicks or geometry issues mean professional service.
- Build a sharpening schedule around your hole count, not the calendar.
- Keep a spare set of blades for long trips so you are never drilling on dull steel.
Kayak. Drill. Catch. Repeat.
See you on the water.
References
[1] Video: How To Sharpen Ice Auger Blades – https://www.themeateater.com/fish/ice-fishing/video-how-to-sharpen-ice-auger-blades
[2] Flat Blade Maintenance For Your Razr Ice Auger: When To Sharpen Or Replace – https://www.razrpowr.com/post/flat-blade-maintenance-for-your-razr-ice-auger-when-to-sharpen-or-replace
[3] Prices – https://lakesareasharpening.com/prices/
[4] Sharpen Auger Blades At Home (Forum Discussion) – https://fishingminnesota.com/forums/topic/206374-sharpen-auger-blades-at-home/
[5] YouTube: Auger Blade Sharpening Tutorial – https://www.youtube.com/watch?v=mJhJTpD67Iw
[6] Auger Blade Sharpening – FISH307.com – https://www.fish307.com/auger-blade-sharpening/
[7] YouTube: DIY Ice Auger Blade Sharpening (March 2026) – https://www.youtube.com/watch?v=aC2Q8faTJNo
[8] Maintaining Auger Points & Blades – https://powerplanter.com/blogs/guides/maintaining-auger-points-blades
[9] Prices – Scott's Sharpening – https://scottssharpening.weebly.com/prices.html
[10] YouTube: Auger Blade Sharpening Technique – https://www.youtube.com/watch?v=fYGkxz6rIQo


