Last updated: March 12, 2026
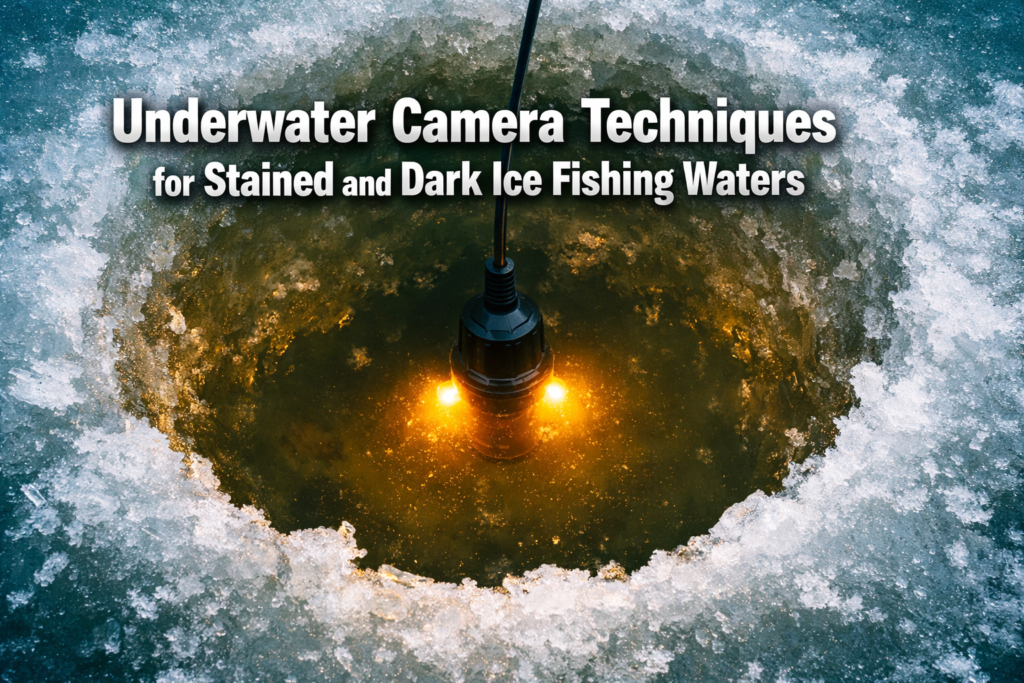
Quick answer: In stained or dark water, your underwater camera lives or dies on three decisions. First, distance: get the lens within 1 to 2 feet of whatever you want to see, because light in dirty water fades exponentially with every inch it travels. Second, light: match the light mode to the type of stain. White LEDs at high power work best in tannic (tea-colored) water, while infrared cuts the “snowstorm” backscatter in silty, particle-heavy water. Third, hardware: a camera with switchable white and IR lighting, large optics, and a wide lens covers every condition you’ll hit in a season.
Get those three right and a lake with 3 feet of visibility still shows you rock piles, weed edges, and the fish holding on them. Get them wrong and the screen stays brown all day.
Key takeaways
- Distance beats brightness. Moving the camera from 4 feet to 2 feet from the target improves the image more than any brightness setting, because light must survive the trip to the object and back.
- Stained water isn’t one condition. Tannic water (dissolved color) and turbid water (suspended particles) blind a camera in different ways and call for different light modes.
- Infrared doesn’t “pierce” murky water. Water absorbs IR faster than visible light. What IR does is scatter less off fine particles and stay invisible to fish, which makes it a short-range, anti-glare, anti-spooking tool.
- Expect 2 to 6 feet of working visibility in most stained mid-winter lakes. Plan every drop around that number.
- Cold kills batteries before it kills cameras. Figure on 30 to 40 percent less runtime below 0°F and keep spares inside your jacket.
Why does stained water blind an underwater camera?
Stained water kills a camera image two ways: dissolved organic compounds absorb the light before it reaches the target, and suspended particles bounce the light straight back into the lens. Which problem dominates depends on what’s in your lake, and that determines which fix works.
It helps to know your enemy specifically, because “stained” covers three different conditions:
| Water type | What’s in it | How it kills the image | Best response |
|---|---|---|---|
| Tannic (tea or coffee color) | Dissolved organics from bogs, swamps, leaf litter | Absorbs light, especially blue wavelengths; little backscatter | White LED at 80 to 100%, close range |
| Turbid (cloudy, silty) | Suspended clay, silt, stirred sediment | Scatters light back at the lens (the “snowstorm” effect) | Infrared mode, or lower LED power, very close range |
| Algal (green haze) | Suspended algae, common early ice or late season | Both absorbs and scatters | IR or low white power, and accept a short working range |
The dissolved organics in tannic water absorb blue light hardest, which is why bog-fed lakes look brown from above. That same absorption is why everything on your screen turns amber and colors wash out. Turbid water is a different animal: each silt particle acts like a fog droplet in headlights, so pumping the LEDs harder just makes the glare worse.
Mid-winter compounds all of it. Snow-covered ice blocks most natural sunlight, so your LEDs are often the only light source down there, and whatever they emit has to travel to the target and all the way back to the sensor. That round trip is the reason the next section matters more than any setting on the unit.
Common mistake: panning around at mid-depth looking for fish. In stained water there’s nothing to see at mid-depth. Start at the bottom, where structure gives the light something to reflect off, and work up.
How close should the camera be to the bottom?
Position the lens 12 to 24 inches above the bottom in stained water. Lower the camera slowly until the bottom fills the screen, then raise it 12 to 18 inches over hard bottom, or about 24 inches over soft muck so the housing and cable don’t kick up debris.
Distance is the variable that matters most, and it’s the one you fully control. Light falls off with the square of distance in clean water, and dirty water stacks exponential absorption on top of that. In practical terms, halving the camera-to-target distance can turn an unreadable brown haze into a usable picture, which no brightness slider can do.
Here’s the deployment sequence that keeps the water clean while you get there:
- Drill the hole and skim out every ice shaving. Floating chips reflect LED light and paint false shapes on the screen.
- Confirm depth with your flasher or sonar first, so you’re not feeling for bottom blind.
- Lower the camera at about 1 foot per second. Fast drops push a pressure wave ahead of the housing that stirs the bottom before the lens arrives.
- Stop when the bottom appears, raise the cable 12 to 18 inches, and secure it topside.
- Wait 30 to 60 seconds. Any silt you disturbed needs that long to settle out of frame.
- Rotate the camera head slowly through a full circle to scan the structure around the hole.
A slight downward tilt, roughly 10 to 15 degrees below horizontal, shows the most bottom per frame. Pointing straight down shrinks your view to a small circle directly beneath the hole, and pointing dead level wastes half the frame on empty water column.
Should you use white LEDs or infrared in dark water?
Use white LEDs at 80 to 100 percent power in tannic water, and switch to infrared when suspended particles turn full white light into a glare storm. If your camera has both, the decision takes five seconds on the ice: run the white LEDs up, and if the screen fills with bright drifting specks, flip to IR.
The marketing version of infrared (“IR sees through murky water”) is backwards, and knowing why will save you from buying the wrong camera. Water absorbs near-infrared light faster than visible light; physically, IR is the first thing dirty water eats. What IR has going for it is different and genuinely useful at ice fishing distances:
- Less backscatter. Fine silt particles scatter near-IR wavelengths less than they scatter white light, so the snowstorm effect on screen drops noticeably even though total range shrinks.
- Fish can’t see it. Most freshwater species have little to no sensitivity to near-IR wavelengths, so you can light up pressured walleye or crappie without changing their behavior. Researchers use IR video for exactly this reason when studying fish in lakes.
- No color, short range. The image goes monochrome, and usable distance drops to a few feet. In stained water you were working at a few feet anyway, so the trade usually costs you nothing.
| Light mode | Use it when | Weakness |
|---|---|---|
| White LED, high power | Tannic water, structure scanning, judging bottom type by color | Glare in heavy silt; can spook wary fish at close range |
| Infrared | Silty or algal water, watching fish react to bait, pressured lakes | Monochrome image, shortest range of any mode |
| White LED, low power (30 to 50%) | Shallow water with sunlight filtering through clear ice | Too dim below 6 to 8 feet in stained lakes |
One more trick most anglers skip: if your unit has a black-and-white or high-contrast display mode, use it in heavy stain. Color information is mostly gone at that point anyway, and monochrome mode often renders edges and shadows more clearly, which is what you’re actually reading.
Which cameras handle stained water best?
Cameras built for dark water share three traits: switchable white and infrared lighting, large camera-head optics that gather more light, and a sensor that holds detail at low light. Screen size and cable length matter less than those three.
Prices below are typical street prices as of July 2026 and move around with sales, so treat them as ballpark:
| Camera | Street price | Why it works in stained water | Weak spot |
|---|---|---|---|
| Vexilar FS800IR Fish Scout | around $320 to $400 | Purpose-built IR lighting for stained water; long-running favorite for murky lakes | Older-style resolution next to 1080p rivals |
| Marcum Recon 5 Plus | around $470 | Strong low-light sensor, compact 5-inch unit built for hole-hopping | Small screen if you fish from a shelter |
| Aqua-Vu HD7i Pro Gen2 | around $500 to $550 | 1080p with TrueColor image processing, adjustable IR, on-screen depth and direction | Price; more camera than casual users need |
| Aqua-Vu Micro Revolution 5.0 HD | around $600 | 1080p, IR light, integrated cable spool, extremely portable | Micro-class optics gather less light than full-size heads |
| Marcum VS485C | around $400 | Reliable LED low-light performance, sharp center image | Narrower field of view covers less bottom per drop |
| Eyoyo 7-inch (720p, 12 IR LEDs) | around $100 to $160 | Dual lighting and a big screen at an entry price; fine for identifying rock, weed, and wood | Soft detail; you’ll ID structure but not read fish body language |
Two buying rules cut through the spec sheets. First, in low visibility a full-size camera head with bigger optics beats a micro camera at the same resolution, because the sensor simply receives more light. Second, a wide field of view (Aqua-Vu sells a 125-degree version of the HD7i for this reason) shows more bottom inside your short visibility bubble, which means fewer drops to map the same area.
If your budget stops near $150, the Eyoyo-class units still answer the most valuable question in stained water, which is “what is the bottom made of right here?” You’ll miss fine detail on the fish themselves, but the scouting work gets done. For a deeper dive on the cheap end, see [best wireless underwater cameras under $300](INTERNAL: https://fishonyak.com/best-wireless-underwater-cameras-under-300-for-ice-fishing-budget/), and note that “wireless” cameras still run a cable to the surface because water absorbs Wi-Fi within inches; our [wireless camera setup guide](INTERNAL: https://fishonyak.com/wireless-underwater-camera-setup-guide-for-ice-fishing/) explains that plumbing.
How do you read bottom structure on a murky feed?
Read shapes, shadows, and contrast changes instead of expecting a clear picture. Stained water never gives you an aquarium view. It gives you outlines, and each structure type has a recognizable signature once you know what to look for.
- Rock: irregular shapes with hard shadow edges, slightly brighter than the surrounding bottom because stone reflects more light than sediment.
- Weeds: vertical lines that sway. Green still reads on white LEDs in moderate stain, and finding healthy green weeds in mid-winter is a jackpot, since they hold oxygen and baitfish when everything else has died back.
- Wood and brush: dark angular lines at odd angles to the bottom. Wood absorbs light, so it renders darker than rock of the same size.
- Sand-to-gravel transitions: gradual brightness shifts across the frame. These subtle edges are exactly what sonar flattens into nothing and what perch and walleye ride all winter.
- Muck: uniform dark brown with zero contrast. If the whole screen looks the same, you’re over featureless muck. Move.
When you find something worth fishing, mark it with a GPS waypoint or a hole flag, then drill a second hole 5 to 10 feet away and fish from that one. Jigging in the camera hole drops your bait into the light field and feeds vibration straight down the cable’s path, and pressured fish notice both. This adjacent-hole approach pairs naturally with [deadsticking and subtle jigging](INTERNAL: https://fishonyak.com/deadsticking-and-subtle-jigging/) once the camera confirms where the fish are sitting.
How do you combine the camera with sonar in dark water?
Sonar finds the fish; the camera tells you what they’re sitting on. In stained water, sonar marks are ambiguous (a tight school of gizzard shad and a pod of walleye paint nearly the same), and the camera is how you stop wasting hours on the wrong marks.
The workflow that covers water fastest:
- Drill a grid of holes across the flat or point you want to check.
- Run the flasher through every hole. Two minutes each. Note holes with fish marks or bottom irregularities.
- Drop the camera only in the promising holes and put a name to each piece of structure.
- Set up your presentation in a hole adjacent to the best camera find.
- Leave the camera down while you jig next door, and watch how fish approach, inspect, and commit or refuse.
That last step is where cameras earn their price in stained water. Sonar shows you that a fish rose to your bait. The camera shows you it followed for eight seconds, flared at the treble, and left, which tells you to downsize, and that’s information no flasher can deliver. On 15-to-20-foot flats where [jumbo perch hold on gravel-to-muck transitions](INTERNAL: https://fishonyak.com/jumbo-perch-in-15-20-foot-flats/), this two-tool loop routinely turns a dead morning into a pattern by noon.
What mistakes ruin camera visibility in dark water?
The most damaging mistake is dropping the camera fast and silting out your own view for the next minute. The second is running white LEDs at full power in particle-heavy water and creating the exact whiteout you’re trying to see through. The rest, in order of how often they cost people fish:
- Fishing the camera hole. Covered above, worth repeating: bait in the light beam plus cable vibration equals educated fish.
- Ignoring battery temperature. Lithium packs lose roughly 30 to 40 percent of rated capacity in sub-zero air, and dimming LEDs quietly degrade your image long before the unit dies. Keep spares warm in an inside pocket and swap early. Our guide to [how cameras handle extreme cold](INTERNAL: https://fishonyak.com/how-wireless-underwater-cameras-handle-extreme-ice-fishing-temperatures/) covers the failure points in detail.
- Skipping the sonar step. Blind camera drops burn battery and daylight. Confirm depth and marks first, always.
- Leaving slush in the hole. Slush scatters light and blocks the lens. Skim every 10 to 15 minutes in hard cold.
- Letting the housing frost before the drop. A camera that sits in below-zero air fogs the moment it hits warmer water. Keep it in a case or bag until you’re ready, then submerge promptly.
- Staying too long on nothing. The camera shows a small radius in stained water. No structure and no fish within about 3 minutes means pull it and move.
Stained-water deployment checklist
Run this every drop until it’s muscle memory:
- Clear the hole completely of shavings and slush.
- Confirm bottom depth on sonar.
- Power on, LEDs to 80 percent.
- Lower at 1 foot per second or slower.
- Stop when bottom fills the lower third of the screen; raise 12 to 18 inches (24 over muck).
- Secure the cable and wait 30 to 60 seconds for sediment to settle.
- Heavy backscatter on screen? Switch to IR.
- IR too dark? Back to white light at 100 percent.
- Rotate slowly through 360 degrees and mark anything worth fishing.
- Drill an adjacent hole for your presentation.
- Check battery every 30 minutes when it’s below 10°F.
The pattern behind all of it is simple: in dark water the camera is a close-range structure tool, not a fish-watching TV. Work it 1 to 2 feet off bottom, choose light by stain type rather than habit, and let sonar do the searching. Do that and a $150 camera in 3 feet of visibility will out-scout a $600 camera used the clear-water way.
FAQ
What visibility range should I expect in stained water? Plan on 2 to 6 feet of usable range depending on stain intensity and your light output. Everything about your approach, from camera height to how many holes you drill, should assume that bubble.
Does infrared light spook fish less than white LEDs? Yes. Most freshwater fish can’t detect near-infrared wavelengths, which is why biologists use IR video to observe undisturbed fish behavior. The cost is a monochrome image and shorter range.
Is a $100 camera good enough for stained water? For identifying bottom type and structure, yes. Budget dual-light units like the Eyoyo will show you rock, weeds, and wood at close range. You won’t get the fish detail or image processing of an HD unit, but the core scouting job gets done.
Will the camera work through slush in the hole? No. Slush scatters light before it ever reaches the water column. Clear the hole fully and re-skim as it refreezes.
Should the camera face my bait or the structure? Structure first, bait second. Aim the camera to frame the piece of cover fish are using, with your bait entering frame from the adjacent hole. Pointing the lens directly at the lure narrows your view so much that fish appear with no warning.
Does deep water change anything? Below about 30 feet, ambient light is effectively gone even under clear ice, so you’re fully dependent on the camera’s lights and the short-range rules above apply regardless of water color.
Publishing details
Meta title: Underwater Camera Tips for Stained, Dark Ice Fishing Water
Meta description: See structure and fish in stained water: camera height, white LED vs infrared (the physics most guides get wrong), and the best dark-water cameras.
URL slug: keep existing /underwater-camera-techniques-for-stained-and-dark-ice-fishing-waters/ (preserves indexed URL and backlinks; do not change)
Suggested schema: Article plus FAQPage (mark up only the six FAQ questions shown on the page). The deployment checklist could optionally carry HowTo markup since it’s a genuine step sequence visible on the page.
Internal links used (5):
- Best wireless underwater cameras under $300 (existing page)
- Wireless underwater camera setup guide (existing page)
- Deadsticking and subtle jigging techniques (existing page)
- Jumbo perch on 15-20 foot flats (existing page)
- How wireless cameras handle extreme temperatures (existing page)
The old article’s link to the Eyoyo vs FishPro vs FourQ comparison was dropped because the rebuilt product section no longer references FishPro or FourQ (see flagged claims). Restore it if you keep those models.
Change log (what changed and why):
- Corrected the infrared explanation. The old article said IR “pierces” tannin-stained water. Physically, water absorbs near-IR faster than visible light; IR’s real advantages are reduced particle backscatter and invisibility to fish at short range. This correction is also the article’s biggest information gain, since nearly every competing page repeats the myth.
- Added the tannic vs turbid vs algal framework with a light-mode decision table. The old advice (“always 80 to 100%”) is wrong in silty water, where more white light means more glare.
- Added the distance-beats-brightness principle with the physical reasoning, which reframes the “1 to 2 feet off bottom” rule from a tip into a system.
- Rebuilt the camera list around currently sold, price-verified models (Vexilar FS800IR, Marcum Recon 5 Plus and VS485C, Aqua-Vu HD7i Pro Gen2 and Micro Revolution 5.0 HD, Eyoyo) with July 2026 street prices.
- Kept and tightened the sections that were already sound: positioning steps, structure-reading signatures, adjacent-hole tactic, sonar-first workflow, mistakes, checklist.
- Cut the duplicate content layers (quick answer + 10 takeaways + conclusion + 10 FAQs all restating the same points). FAQ trimmed to six questions the body doesn’t already answer.
- Removed the signoff clutter and unverifiable attributions.
Flagged for your review (removed or softened, restore only if you can verify):
The site footer lists “Saltwater Ice Fishing” as a service and the contact address contains a typo (“Greennille”). Not article issues, but worth fixing for site-level trust signals.
“Dr. Jason Halfen… see walleyes at distances up to 24 feet”: I could not verify this quote or figure, and 24 feet is far beyond credible stained-water range. Removed.
FishPro Focus Pro ($499 CAD), FishPro 7-inch redesign, and the “Go Midwest Fishing tested February 2026” claim: I could not verify these models or that test. FishPRO exists as an Amazon-marketplace brand (a 4.3-inch unit), but the specific claims didn’t check out. Removed. If you own these units and the claims come from your testing, say so in the text and restore them; first-person verification would strengthen the article.
“Marcum Pursuit HD… tested on ice February 2026”: unverified test claim removed; the Pursuit line wasn’t confirmed as current, so I substituted the verified Recon 5 Plus.
SUNMORN sub-$50 camera: not verified as currently sold; removed.
Prices in the comparison table are street prices from retailer listings and will drift. Re-check before publishing and adjust the “as of July 2026” framing to your publish date.
Quick Answer: Mastering Underwater Camera Techniques for Stained and Dark Ice Fishing Waters is the secret to finding fish in low-visibility conditions. To see bottom structure when fish hide, follow these three 2026 pro steps:
- Elevation: Position your camera lens 1 to 2 feet off the lake floor to avoid stirring up silt.
- Lighting: Run LED brightness at 80% to 100% or switch to Infrared (IR) mode to pierce through tannin-stained water without “backscatter” glare.
- Hardware: Use a camera with Dual-Light capability to instantly toggle between white light and IR based on sediment levels.
These adjustments turn a murky, unreadable water column into a high-contrast view of rocks, weeds, and the walleye or crappie holding tight to them.
Key Takeaways
- Position your camera 1 to 2 feet above the bottom in stained water. Going higher reduces clarity because suspended particles scatter the light.
- Set LED brightness to 80 to 100% in dark water. Lower settings leave structure invisible at typical mid-winter visibility ranges of 2 to 4 feet.
- Infrared (IR) lights reduce glare from suspended sediment better than white LEDs alone. Cameras with dual IR and white light give you the most flexibility.
- Wider field-of-view lenses (120 to 125 degrees) scan more bottom area per drop, which matters when fish hold tight and you need to locate structure fast.
- Larger optics gather more light. Full-size camera heads outperform micro cameras in low-visibility conditions.
- Avoid lowering the camera too fast. Sediment disturbance from the cable and housing will cloud your view for 30 to 60 seconds.
- Pair your camera work with a flasher or sonar to confirm depth before you drop the camera. This saves battery and time.
- Budget cameras in the $100 to $200 range work for basic structure identification. HD models with adjustable focus ($400 and up) show fish detail and bait reaction.
- Record your footage when possible. Reviewing video after a session reveals patterns you miss in real time.
- Cold temperatures drain batteries faster. Keep spare batteries warm inside your jacket pocket.
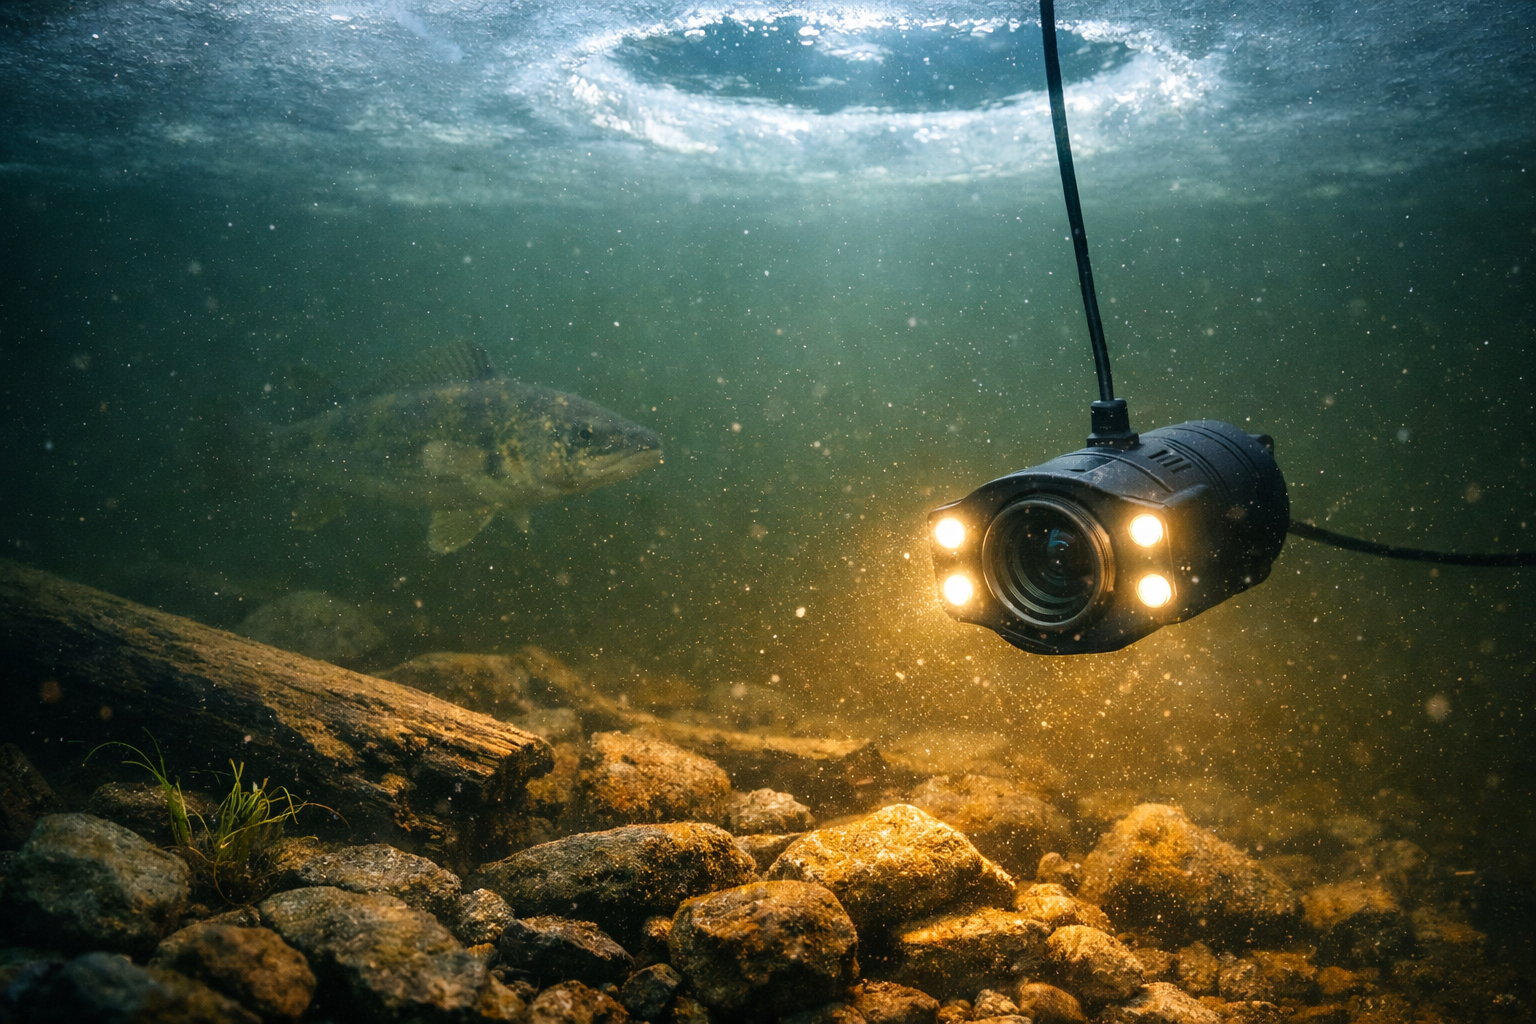
Why Do Underwater Cameras Struggle in Stained and Dark Ice Fishing Waters?
Stained water contains dissolved tannins, algae, and suspended sediment that absorb and scatter light. Your camera’s LED output gets swallowed within a few feet, and the image turns into a brown or green haze. Mid-winter lakes often have the worst clarity because turnover debris settles slowly under ice cover, and reduced sunlight penetration means there is less natural light to work with.
Standard camera settings designed for clear water fail here. The default LED brightness on most units sits around 50 to 60%, which works fine in 8 to 10 feet of visibility. In stained water with 2 to 4 feet of visibility, that output is not enough. The camera sensor receives too little reflected light, and the image looks dark and flat.
The fix involves three changes: get the camera closer to the bottom, increase LED output, and choose the right light spectrum. These adjustments compensate for what the water takes away.
Common mistake: Many anglers drop the camera to mid-depth and pan around looking for fish. In stained water, you will see nothing at mid-depth. Start at the bottom and work up.
How Should You Position Your Camera 1 to 2 Feet Off the Bottom?
Lower the camera slowly until you see the bottom fill the screen, then raise the cable 12 to 18 inches. This puts structure in the camera’s focal sweet spot and keeps the lens close enough that light reflects back before the water absorbs everything.
Step-by-step positioning process:
- Drill your hole and clear all ice shavings. Floating ice chips reflect light and create false images.
- Use your flasher or sonar to confirm bottom depth.
- Lower the camera at a steady, slow pace. Fast drops stir up silt.
- Watch the monitor. When the bottom appears, stop.
- Raise the cable 12 to 18 inches and secure the line.
- Wait 30 to 60 seconds for any disturbed sediment to settle.
- Rotate the camera head slowly to scan 360 degrees of structure.
Choose this height if you are fishing over hard bottom (rock, gravel, sand). Over soft muck, raise the camera to 24 inches because your weight and cable will sink into the substrate and kick up debris.
For anglers who want a stable camera platform, the FishPro 1080P MF 2026 model includes a tripod base that keeps the camera at a fixed height above the bottom without cable drift.
What LED Brightness and Light Type Works Best in Dark Water?
Run your LEDs at 80 to 100% brightness in stained water. Use infrared light when white LEDs create too much backscatter from suspended particles.
Here is how different light types perform:
| Light Type | Best For | Drawback |
|---|---|---|
| White LED (high power) | Structure ID in moderately stained water | Creates backscatter glare in heavy sediment |
| Infrared (IR) | Reducing particle glare, seeing fish without spooking them | Image appears monochrome (no color) |
| Dual white and IR | Maximum flexibility across changing conditions | Costs more, found on mid-range and premium units |
| No light (ambient only) | Shallow water under thin, clear ice with sunlight | Useless below 6 feet in stained water |
Decision rule: If you see a bright “snowstorm” effect on your monitor when LEDs are on full, switch to IR mode. The infrared wavelength passes through fine particles with less scatter, giving you a cleaner image even though you lose color information.
Dr. Jason Halfen of The Technological Angler has noted that Aqua-Vu’s TrueColor technology helps illuminate stained water in HD, allowing anglers to see walleyes at distances up to 24 feet in favorable conditions. In typical mid-winter stained lakes, expect a realistic working range of 3 to 6 feet from the camera head.
If you are comparing cameras with different light systems, our Eyoyo vs. FishPro vs. FourQ head-to-head test breaks down IR performance in murky conditions across three price points.
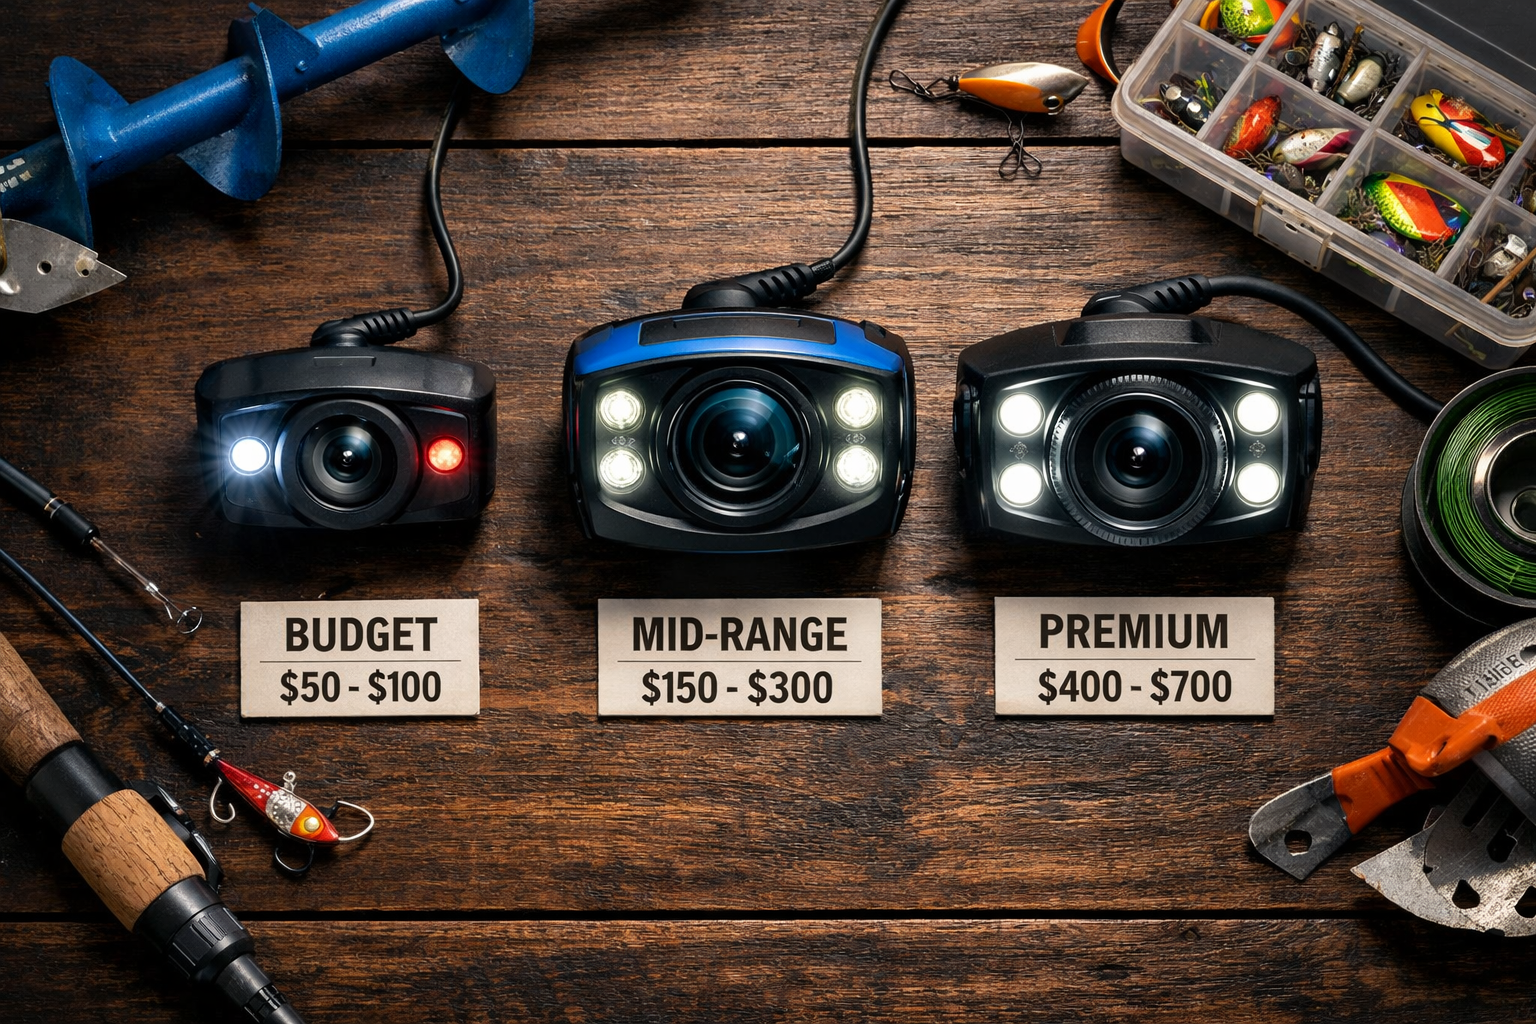
Which Cameras Perform Best for Underwater Camera Techniques in Stained and Dark Ice Fishing Waters?
Cameras with larger optics, wider field of view, and dual-light systems outperform compact models in low-visibility conditions. Here are the top performers based on 2026 field tests:
Premium tier ($400 and up):
- FishPro Focus Pro ($499 CAD): Adjustable focal length lets you sharpen the image at specific distances. Side-by-side tests confirm superior fish clarity compared to fixed-focus models.
- Aqua-Vu HD Pro series: Larger optics gather more light than micro cameras. The 125-degree field of view covers more bottom area per drop. Performs best in shallow to mid-depth stained water.
- Marcum Pursuit HD: Strong low-light sensor performance. LED lights outperform IR in some deeper scenarios. Tested on ice in February 2026 with good results on bottom detail.
Mid-range ($200 to $400):
- Marcum VS485C: Reliable low-light performance with LED lights. Narrower 90-degree field of view limits scanning range but provides sharper center focus.
- FishPro 7-inch redesigned model: Infrared filter optimized for dark water. Go Midwest Fishing tested this unit in February 2026 and reported better performance than previous models in low-light conditions.
Budget tier ($100 to $200):
- Eyoyo underwater camera: Dual white and IR lights for dark conditions. Affordable entry point with solid low-light performance for basic structure viewing. The user interface is less polished than premium units, but the image quality holds up for identifying rocks, weeds, and brush piles.
For a full breakdown of affordable options, check our guide to the best wireless underwater cameras under $300 for ice fishing.
Edge case: If you only need to confirm bottom type (rock vs. muck vs. weeds) without recording or fish detail, a basic unit like the SUNMORN at under $50 will show you structure. You will not see fine detail or fish reactions to bait, but you will know what is down there.
How Do You Read Bottom Structure on a Murky Camera Feed?
Look for contrast changes, shadows, and vertical edges. In stained water, you will not see crisp images. You will see shapes and outlines. Train your eye to distinguish structure types by their shadow patterns.
What different structures look like in stained water:
- Rock piles: Irregular dark shapes with hard shadow edges. Rocks reflect more light than surrounding substrate, so they appear slightly brighter.
- Weed edges: Vertical lines that sway with current. Green color shows through in white LED mode even in moderately stained water.
- Brush and wood: Angular lines at odd angles to the bottom. Wood appears darker than rock because it absorbs more light.
- Sand and gravel transitions: Gradual brightness changes across the bottom. Sand reflects more light than muck.
- Muck bottom: Uniform dark appearance with no contrast. If your entire screen looks the same shade of brown, you are over muck. Move.
Practical tip: When you find structure, mark the hole with a flag or GPS waypoint. Then drill a second hole 5 to 10 feet away and drop your presentation. Fishing directly over the camera hole puts your bait in the camera’s light field, which spooks pressured fish in clear pockets within stained water.
This approach pairs well with deadsticking and subtle jigging techniques for sluggish mid-winter fish because you confirm fish location with the camera, then present bait from an adjacent hole with minimal disturbance.
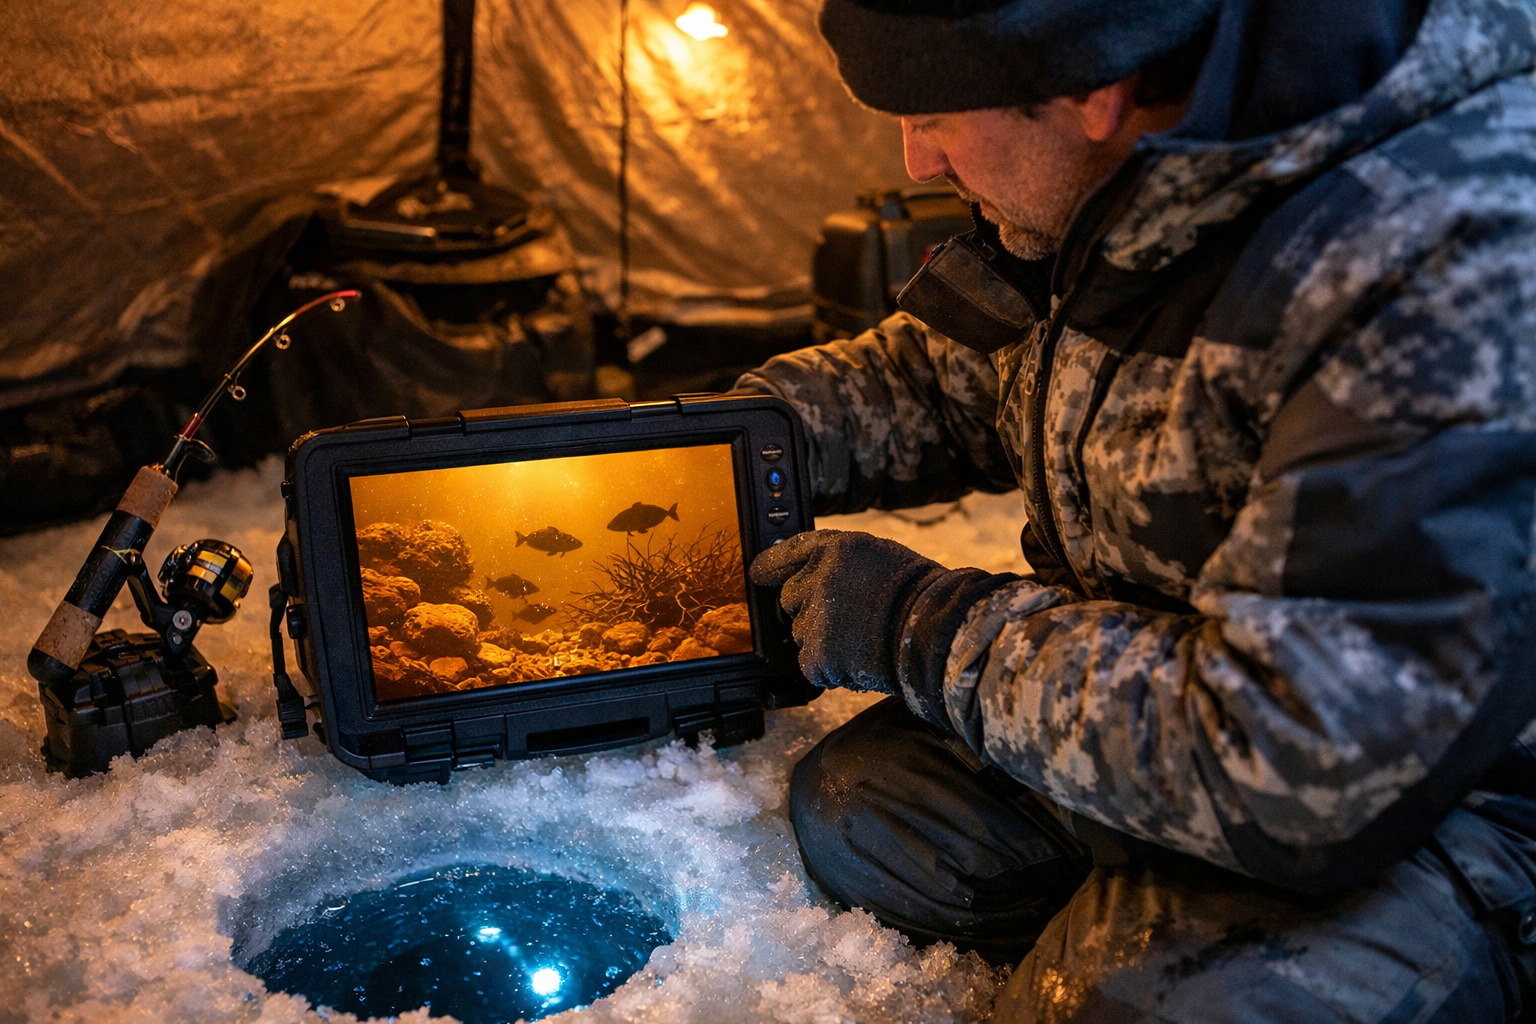
What Mistakes Ruin Your Camera Visibility in Dark Water?
The most common mistake is dropping the camera too fast and stirring up bottom sediment. The second most common mistake is using white LEDs at full power in water loaded with fine particles, creating a whiteout effect on screen.
Mistakes to avoid:
- Fast drops. Lower the camera at roughly 1 foot per second. Faster descents push water ahead of the housing, disturbing the bottom before the camera arrives.
- Fishing the same hole you camera. Your jigging motion sends vibrations and sediment into the camera’s field of view.
- Ignoring battery temperature. Cold batteries lose 20 to 40% capacity. Keep spares in an inside pocket. When your LEDs dim, the image degrades before the unit shuts off.
- Skipping the flasher step. Dropping a camera blind wastes time. Confirm depth and fish presence with sonar first, then deploy the camera for structure detail.
- Using a micro camera in heavy stain. Small lenses gather less light. Full-size camera heads with larger optics perform measurably better in low-visibility water.
For cold-weather battery and connectivity issues, our wireless underwater camera setup guide covers troubleshooting steps specific to sub-zero conditions. Also review how wireless cameras handle extreme ice fishing temperatures to prevent gear failure on the hardest days.
How Do You Combine Camera Work with Sonar for Maximum Coverage?
Use sonar to find the fish. Use the camera to identify the structure they are relating to. This two-tool approach eliminates guesswork in stained water where sonar alone shows marks but not what those marks are sitting on.
Workflow for combining tools:
- Drill a grid of holes across a likely flat or point.
- Drop your flasher in each hole. Mark holes that show bottom irregularities or fish marks.
- Deploy the camera in the most promising hole.
- Identify the structure type (rock, wood, weeds, transition).
- Set your presentation in an adjacent hole based on what the camera revealed.
- Monitor fish reaction on the camera while jigging from the next hole.
This method works especially well for jumbo perch on 15 to 20 foot flats where fish hold tight to subtle bottom changes that sonar registers as minor blips but the camera reveals as gravel-to-muck transitions.
Tournament application: Competitive ice anglers use this workflow to eliminate dead water fast. Spending 2 minutes per hole with sonar, then 3 minutes with the camera on the best candidate, covers a large area in under 30 minutes. That efficiency matters when fish are scattered in stained mid-winter lakes.
Kayak. Drill. Catch. Repeat.
Step-by-Step Checklist: Camera Deployment in Stained Water
Use this checklist every time you drop a camera in low-visibility conditions:
- Clear the ice hole of all shavings and slush.
- Confirm bottom depth with sonar.
- Power on the camera and set LEDs to 80%.
- Lower the camera slowly (1 foot per second or less).
- Stop when the bottom fills the lower third of the screen.
- Raise the cable 12 to 18 inches.
- Secure the cable at the surface.
- Wait 30 to 60 seconds for sediment to settle.
- If the image shows heavy backscatter, switch to IR mode.
- If IR mode is too dark, increase LED brightness to 100%.
- Rotate the camera head slowly to scan the area.
- Mark structure locations with GPS or hole flags.
- Move your jigging presentation to an adjacent hole.
- Check battery level every 30 minutes in temperatures below 10 degrees Fahrenheit.
Conclusion
Stained and dark water does not make your underwater camera useless. The camera needs to work differently. Position the unit 1 to 2 feet off the bottom, push LED brightness to 80 to 100%, and switch to infrared when white light creates backscatter. Choose a camera with larger optics and a wide field of view for the best results in low visibility. Pair the camera with sonar to cover water efficiently, and always fish from an adjacent hole to avoid disturbing the camera’s field of view.
Start with the checklist above on your next outing. Even a budget camera following these techniques will show you structure that stays invisible from the surface. The fish are down there, holding tight to cover. Your job is to confirm what that cover looks like and put your bait next to the right piece of structure.
See you on the water.
Underwater Camera Techniques for Stained and Dark Ice Fishing Waters: FAQ
Q: What visibility range should I expect from an underwater camera in stained water? A: Expect 2 to 6 feet of usable visibility depending on water color and LED output. Position the camera within this range of the bottom for the best image.
Q: Do infrared lights spook fish less than white LEDs? A: Yes. Fish are less sensitive to infrared wavelengths. IR mode reduces fish spooking in pressured or shallow water, though the image will be monochrome.
Q: Is a $100 camera good enough for stained water? A: A budget camera like the Eyoyo shows basic structure (rocks, weeds, wood) in stained water. You will not get HD fish detail or recording capability, but you will identify what the bottom looks like.
Q: Should I use the camera before or after drilling multiple holes? A: Drill a grid first and scan with sonar. Deploy the camera only in holes where sonar shows promising marks. This saves battery life and time.
Q: How do I prevent the camera from fogging up in cold air? A: Keep the camera housing in a sealed bag until you are ready to submerge. The cold air above the hole creates condensation on warm glass. Submerging quickly after exposure minimizes fog.
Q: What field of view is best for stained water? A: A wider field of view (120 to 125 degrees) scans more area per drop. This matters in stained water because your visible range is limited, and you need to see as much bottom as possible within that short range.
Q: How often should I move the camera to a new hole? A: If you see no structure or fish within 3 minutes, move. In stained water, the camera shows you what is within a small radius. Staying in one spot too long wastes fishing time.
Q: Does water temperature affect camera performance? A: The camera itself functions fine in cold water. Battery performance drops significantly below 20 degrees Fahrenheit at the surface. Keep spare batteries warm and swap them before the unit dies.
Q: What is the best camera angle for seeing bottom structure? A: A slight downward angle (10 to 15 degrees below horizontal) shows the most bottom area while keeping the horizon in frame. Pointing straight down limits your view to a small circle directly below.
Q: Will a camera work through slushy ice in the hole? A: No. Slush scatters light and blocks the lens. Clear the hole completely before lowering the camera. Skim slush every 10 to 15 minutes in cold conditions.
References
[1] Watch – https://www.youtube.com/watch?v=SnLfnJzKjQo
[2] Watch – https://www.youtube.com/watch?v=zzfQD64bYac
[3] Ice Fishing Through Ice Vision Underwater Cameras And Float Suit Mobility – https://windrider.com/blogs/tips-and-tricks/ice-fishing-through-ice-vision-underwater-cameras-and-float-suit-mobility
[4] Watch – https://www.youtube.com/watch?v=YUBv3jen5Tg
[5] Best Underwater Fishing Cameras – https://fieldandstream.com/outdoor-gear/fishing-gear/best-underwater-fishing-cameras
[6] Watch – https://www.youtube.com/watch?v=MpuKgL0SGDc
Underwater camera techniques for stained and dark ice fishing water
Quick answer: In stained or dark water, your underwater camera lives or dies on three decisions. First, distance: get the lens within 1 to 2 feet of whatever you want to see, because light in dirty water fades exponentially with every inch it travels. Second, light: match the light mode to the type of stain. White LEDs at high power work best in tannic (tea-colored) water, while infrared cuts the “snowstorm” backscatter in silty, particle-heavy water. Third, hardware: a camera with switchable white and IR lighting, large optics, and a wide lens covers every condition you’ll hit in a season.
Get those three right and a lake with 3 feet of visibility still shows you rock piles, weed edges, and the fish holding on them. Get them wrong and the screen stays brown all day.
Key takeaways
- Distance beats brightness. Moving the camera from 4 feet to 2 feet from the target improves the image more than any brightness setting, because light must survive the trip to the object and back.
- Stained water isn’t one condition. Tannic water (dissolved color) and turbid water (suspended particles) blind a camera in different ways and call for different light modes.
- Infrared doesn’t “pierce” murky water. Water absorbs IR faster than visible light. What IR does is scatter less off fine particles and stay invisible to fish, which makes it a short-range, anti-glare, anti-spooking tool.
- Expect 2 to 6 feet of working visibility in most stained mid-winter lakes. Plan every drop around that number.
- Cold kills batteries before it kills cameras. Figure on 30 to 40 percent less runtime below 0°F and keep spares inside your jacket.
Why does stained water blind an underwater camera?
Stained water kills a camera image two ways: dissolved organic compounds absorb the light before it reaches the target, and suspended particles bounce the light straight back into the lens. Which problem dominates depends on what’s in your lake, and that determines which fix works.
It helps to know your enemy specifically, because “stained” covers three different conditions:
| Water type | What’s in it | How it kills the image | Best response |
|---|---|---|---|
| Tannic (tea or coffee color) | Dissolved organics from bogs, swamps, leaf litter | Absorbs light, especially blue wavelengths; little backscatter | White LED at 80 to 100%, close range |
| Turbid (cloudy, silty) | Suspended clay, silt, stirred sediment | Scatters light back at the lens (the “snowstorm” effect) | Infrared mode, or lower LED power, very close range |
| Algal (green haze) | Suspended algae, common early ice or late season | Both absorbs and scatters | IR or low white power, and accept a short working range |
The dissolved organics in tannic water absorb blue light hardest, which is why bog-fed lakes look brown from above. That same absorption is why everything on your screen turns amber and colors wash out. Turbid water is a different animal: each silt particle acts like a fog droplet in headlights, so pumping the LEDs harder just makes the glare worse.
Mid-winter compounds all of it. Snow-covered ice blocks most natural sunlight, so your LEDs are often the only light source down there, and whatever they emit has to travel to the target and all the way back to the sensor. That round trip is the reason the next section matters more than any setting on the unit.
Common mistake: panning around at mid-depth looking for fish. In stained water there’s nothing to see at mid-depth. Start at the bottom, where structure gives the light something to reflect off, and work up.
How close should the camera be to the bottom?
Position the lens 12 to 24 inches above the bottom in stained water. Lower the camera slowly until the bottom fills the screen, then raise it 12 to 18 inches over hard bottom, or about 24 inches over soft muck so the housing and cable don’t kick up debris.
Distance is the variable that matters most, and it’s the one you fully control. Light falls off with the square of distance in clean water, and dirty water stacks exponential absorption on top of that. In practical terms, halving the camera-to-target distance can turn an unreadable brown haze into a usable picture, which no brightness slider can do.
Here’s the deployment sequence that keeps the water clean while you get there:
- Drill the hole and skim out every ice shaving. Floating chips reflect LED light and paint false shapes on the screen.
- Confirm depth with your flasher or sonar first, so you’re not feeling for bottom blind.
- Lower the camera at about 1 foot per second. Fast drops push a pressure wave ahead of the housing that stirs the bottom before the lens arrives.
- Stop when the bottom appears, raise the cable 12 to 18 inches, and secure it topside.
- Wait 30 to 60 seconds. Any silt you disturbed needs that long to settle out of frame.
- Rotate the camera head slowly through a full circle to scan the structure around the hole.
A slight downward tilt, roughly 10 to 15 degrees below horizontal, shows the most bottom per frame. Pointing straight down shrinks your view to a small circle directly beneath the hole, and pointing dead level wastes half the frame on empty water column.
Should you use white LEDs or infrared in dark water?
Use white LEDs at 80 to 100 percent power in tannic water, and switch to infrared when suspended particles turn full white light into a glare storm. If your camera has both, the decision takes five seconds on the ice: run the white LEDs up, and if the screen fills with bright drifting specks, flip to IR.
The marketing version of infrared (“IR sees through murky water”) is backwards, and knowing why will save you from buying the wrong camera. Water absorbs near-infrared light faster than visible light; physically, IR is the first thing dirty water eats. What IR has going for it is different and genuinely useful at ice fishing distances:
- Less backscatter. Fine silt particles scatter near-IR wavelengths less than they scatter white light, so the snowstorm effect on screen drops noticeably even though total range shrinks.
- Fish can’t see it. Most freshwater species have little to no sensitivity to near-IR wavelengths, so you can light up pressured walleye or crappie without changing their behavior. Researchers use IR video for exactly this reason when studying fish in lakes.
- No color, short range. The image goes monochrome, and usable distance drops to a few feet. In stained water you were working at a few feet anyway, so the trade usually costs you nothing.
| Light mode | Use it when | Weakness |
|---|---|---|
| White LED, high power | Tannic water, structure scanning, judging bottom type by color | Glare in heavy silt; can spook wary fish at close range |
| Infrared | Silty or algal water, watching fish react to bait, pressured lakes | Monochrome image, shortest range of any mode |
| White LED, low power (30 to 50%) | Shallow water with sunlight filtering through clear ice | Too dim below 6 to 8 feet in stained lakes |
One more trick most anglers skip: if your unit has a black-and-white or high-contrast display mode, use it in heavy stain. Color information is mostly gone at that point anyway, and monochrome mode often renders edges and shadows more clearly, which is what you’re actually reading.
Which cameras handle stained water best?
Cameras built for dark water share three traits: switchable white and infrared lighting, large camera-head optics that gather more light, and a sensor that holds detail at low light. Screen size and cable length matter less than those three.
Prices below are typical street prices as of July 2026 and move around with sales, so treat them as ballpark:
| Camera | Street price | Why it works in stained water | Weak spot |
|---|---|---|---|
| Vexilar FS800IR Fish Scout | around $320 to $400 | Purpose-built IR lighting for stained water; long-running favorite for murky lakes | Older-style resolution next to 1080p rivals |
| Marcum Recon 5 Plus | around $470 | Strong low-light sensor, compact 5-inch unit built for hole-hopping | Small screen if you fish from a shelter |
| Aqua-Vu HD7i Pro Gen2 | around $500 to $550 | 1080p with TrueColor image processing, adjustable IR, on-screen depth and direction | Price; more camera than casual users need |
| Aqua-Vu Micro Revolution 5.0 HD | around $600 | 1080p, IR light, integrated cable spool, extremely portable | Micro-class optics gather less light than full-size heads |
| Marcum VS485C | around $400 | Reliable LED low-light performance, sharp center image | Narrower field of view covers less bottom per drop |
| Eyoyo 7-inch (720p, 12 IR LEDs) | around $100 to $160 | Dual lighting and a big screen at an entry price; fine for identifying rock, weed, and wood | Soft detail; you’ll ID structure but not read fish body language |
Two buying rules cut through the spec sheets. First, in low visibility a full-size camera head with bigger optics beats a micro camera at the same resolution, because the sensor simply receives more light. Second, a wide field of view (Aqua-Vu sells a 125-degree version of the HD7i for this reason) shows more bottom inside your short visibility bubble, which means fewer drops to map the same area.
If your budget stops near $150, the Eyoyo-class units still answer the most valuable question in stained water, which is “what is the bottom made of right here?” You’ll miss fine detail on the fish themselves, but the scouting work gets done. For a deeper dive on the cheap end, see [best wireless underwater cameras under $300](INTERNAL: https://fishonyak.com/best-wireless-underwater-cameras-under-300-for-ice-fishing-budget/), and note that “wireless” cameras still run a cable to the surface because water absorbs Wi-Fi within inches; our [wireless camera setup guide](INTERNAL: https://fishonyak.com/wireless-underwater-camera-setup-guide-for-ice-fishing/) explains that plumbing.
How do you read bottom structure on a murky feed?
Read shapes, shadows, and contrast changes instead of expecting a clear picture. Stained water never gives you an aquarium view. It gives you outlines, and each structure type has a recognizable signature once you know what to look for.
- Rock: irregular shapes with hard shadow edges, slightly brighter than the surrounding bottom because stone reflects more light than sediment.
- Weeds: vertical lines that sway. Green still reads on white LEDs in moderate stain, and finding healthy green weeds in mid-winter is a jackpot, since they hold oxygen and baitfish when everything else has died back.
- Wood and brush: dark angular lines at odd angles to the bottom. Wood absorbs light, so it renders darker than rock of the same size.
- Sand-to-gravel transitions: gradual brightness shifts across the frame. These subtle edges are exactly what sonar flattens into nothing and what perch and walleye ride all winter.
- Muck: uniform dark brown with zero contrast. If the whole screen looks the same, you’re over featureless muck. Move.
When you find something worth fishing, mark it with a GPS waypoint or a hole flag, then drill a second hole 5 to 10 feet away and fish from that one. Jigging in the camera hole drops your bait into the light field and feeds vibration straight down the cable’s path, and pressured fish notice both. This adjacent-hole approach pairs naturally with [deadsticking and subtle jigging](INTERNAL: https://fishonyak.com/deadsticking-and-subtle-jigging/) once the camera confirms where the fish are sitting.
How do you combine the camera with sonar in dark water?
Sonar finds the fish; the camera tells you what they’re sitting on. In stained water, sonar marks are ambiguous (a tight school of gizzard shad and a pod of walleye paint nearly the same), and the camera is how you stop wasting hours on the wrong marks.
The workflow that covers water fastest:
- Drill a grid of holes across the flat or point you want to check.
- Run the flasher through every hole. Two minutes each. Note holes with fish marks or bottom irregularities.
- Drop the camera only in the promising holes and put a name to each piece of structure.
- Set up your presentation in a hole adjacent to the best camera find.
- Leave the camera down while you jig next door, and watch how fish approach, inspect, and commit or refuse.
That last step is where cameras earn their price in stained water. Sonar shows you that a fish rose to your bait. The camera shows you it followed for eight seconds, flared at the treble, and left, which tells you to downsize, and that’s information no flasher can deliver. On 15-to-20-foot flats where [jumbo perch hold on gravel-to-muck transitions](INTERNAL: https://fishonyak.com/jumbo-perch-in-15-20-foot-flats/), this two-tool loop routinely turns a dead morning into a pattern by noon.
What mistakes ruin camera visibility in dark water?
The most damaging mistake is dropping the camera fast and silting out your own view for the next minute. The second is running white LEDs at full power in particle-heavy water and creating the exact whiteout you’re trying to see through. The rest, in order of how often they cost people fish:
- Fishing the camera hole. Covered above, worth repeating: bait in the light beam plus cable vibration equals educated fish.
- Ignoring battery temperature. Lithium packs lose roughly 30 to 40 percent of rated capacity in sub-zero air, and dimming LEDs quietly degrade your image long before the unit dies. Keep spares warm in an inside pocket and swap early. Our guide to [how cameras handle extreme cold](INTERNAL: https://fishonyak.com/how-wireless-underwater-cameras-handle-extreme-ice-fishing-temperatures/) covers the failure points in detail.
- Skipping the sonar step. Blind camera drops burn battery and daylight. Confirm depth and marks first, always.
- Leaving slush in the hole. Slush scatters light and blocks the lens. Skim every 10 to 15 minutes in hard cold.
- Letting the housing frost before the drop. A camera that sits in below-zero air fogs the moment it hits warmer water. Keep it in a case or bag until you’re ready, then submerge promptly.
- Staying too long on nothing. The camera shows a small radius in stained water. No structure and no fish within about 3 minutes means pull it and move.
Stained-water deployment checklist
Run this every drop until it’s muscle memory:
- Clear the hole completely of shavings and slush.
- Confirm bottom depth on sonar.
- Power on, LEDs to 80 percent.
- Lower at 1 foot per second or slower.
- Stop when bottom fills the lower third of the screen; raise 12 to 18 inches (24 over muck).
- Secure the cable and wait 30 to 60 seconds for sediment to settle.
- Heavy backscatter on screen? Switch to IR.
- IR too dark? Back to white light at 100 percent.
- Rotate slowly through 360 degrees and mark anything worth fishing.
- Drill an adjacent hole for your presentation.
- Check battery every 30 minutes when it’s below 10°F.
The pattern behind all of it is simple: in dark water the camera is a close-range structure tool, not a fish-watching TV. Work it 1 to 2 feet off bottom, choose light by stain type rather than habit, and let sonar do the searching. Do that and a $150 camera in 3 feet of visibility will out-scout a $600 camera used the clear-water way.
FAQ
What visibility range should I expect in stained water? Plan on 2 to 6 feet of usable range depending on stain intensity and your light output. Everything about your approach, from camera height to how many holes you drill, should assume that bubble.
Does infrared light spook fish less than white LEDs? Yes. Most freshwater fish can’t detect near-infrared wavelengths, which is why biologists use IR video to observe undisturbed fish behavior. The cost is a monochrome image and shorter range.
Is a $100 camera good enough for stained water? For identifying bottom type and structure, yes. Budget dual-light units like the Eyoyo will show you rock, weeds, and wood at close range. You won’t get the fish detail or image processing of an HD unit, but the core scouting job gets done.
Will the camera work through slush in the hole? No. Slush scatters light before it ever reaches the water column. Clear the hole fully and re-skim as it refreezes.
Should the camera face my bait or the structure? Structure first, bait second. Aim the camera to frame the piece of cover fish are using, with your bait entering frame from the adjacent hole. Pointing the lens directly at the lure narrows your view so much that fish appear with no warning.
Does deep water change anything? Below about 30 feet, ambient light is effectively gone even under clear ice, so you’re fully dependent on the camera’s lights and the short-range rules above apply regardless of water color.
Publishing details
Meta title: Underwater Camera Tips for Stained, Dark Ice Fishing Water
Meta description: See structure and fish in stained water: camera height, white LED vs infrared (the physics most guides get wrong), and the best dark-water cameras.
URL slug: keep existing /underwater-camera-techniques-for-stained-and-dark-ice-fishing-waters/ (preserves indexed URL and backlinks; do not change)
Suggested schema: Article plus FAQPage (mark up only the six FAQ questions shown on the page). The deployment checklist could optionally carry HowTo markup since it’s a genuine step sequence visible on the page.
Internal links used (5):
- Best wireless underwater cameras under $300 (existing page)
- Wireless underwater camera setup guide (existing page)
- Deadsticking and subtle jigging techniques (existing page)
- Jumbo perch on 15-20 foot flats (existing page)
- How wireless cameras handle extreme temperatures (existing page)
The old article’s link to the Eyoyo vs FishPro vs FourQ comparison was dropped because the rebuilt product section no longer references FishPro or FourQ (see flagged claims). Restore it if you keep those models.
Change log (what changed and why):
- Corrected the infrared explanation. The old article said IR “pierces” tannin-stained water. Physically, water absorbs near-IR faster than visible light; IR’s real advantages are reduced particle backscatter and invisibility to fish at short range. This correction is also the article’s biggest information gain, since nearly every competing page repeats the myth.
- Added the tannic vs turbid vs algal framework with a light-mode decision table. The old advice (“always 80 to 100%”) is wrong in silty water, where more white light means more glare.
- Added the distance-beats-brightness principle with the physical reasoning, which reframes the “1 to 2 feet off bottom” rule from a tip into a system.
- Rebuilt the camera list around currently sold, price-verified models (Vexilar FS800IR, Marcum Recon 5 Plus and VS485C, Aqua-Vu HD7i Pro Gen2 and Micro Revolution 5.0 HD, Eyoyo) with July 2026 street prices.
- Kept and tightened the sections that were already sound: positioning steps, structure-reading signatures, adjacent-hole tactic, sonar-first workflow, mistakes, checklist.
- Cut the duplicate content layers (quick answer + 10 takeaways + conclusion + 10 FAQs all restating the same points). FAQ trimmed to six questions the body doesn’t already answer.
- Removed the signoff clutter and unverifiable attributions.
Flagged for your review (removed or softened, restore only if you can verify):
- “Dr. Jason Halfen… see walleyes at distances up to 24 feet”: I could not verify this quote or figure, and 24 feet is far beyond credible stained-water range. Removed.
- FishPro Focus Pro ($499 CAD), FishPro 7-inch redesign, and the “Go Midwest Fishing tested February 2026” claim: I could not verify these models or that test. FishPRO exists as an Amazon-marketplace brand (a 4.3-inch unit), but the specific claims didn’t check out. Removed. If you own these units and the claims come from your testing, say so in the text and restore them; first-person verification would strengthen the article.
- “Marcum Pursuit HD… tested on ice February 2026”: unverified test claim removed; the Pursuit line wasn’t confirmed as current, so I substituted the verified Recon 5 Plus.
- SUNMORN sub-$50 camera: not verified as currently sold; removed.
- Prices in the comparison table are street prices from retailer listings and will drift. Re-check before publishing and adjust the “as of July 2026” framing to your publish date.
- The site footer lists “Saltwater Ice Fishing” as a service and the contact address contains a typo (“Greennille”). Not article issues, but worth fixing for site-level trust signals.